Streetwise Stun Gun Review & How-to
Posted: Sat Jul 04, 2009 12:07 pm
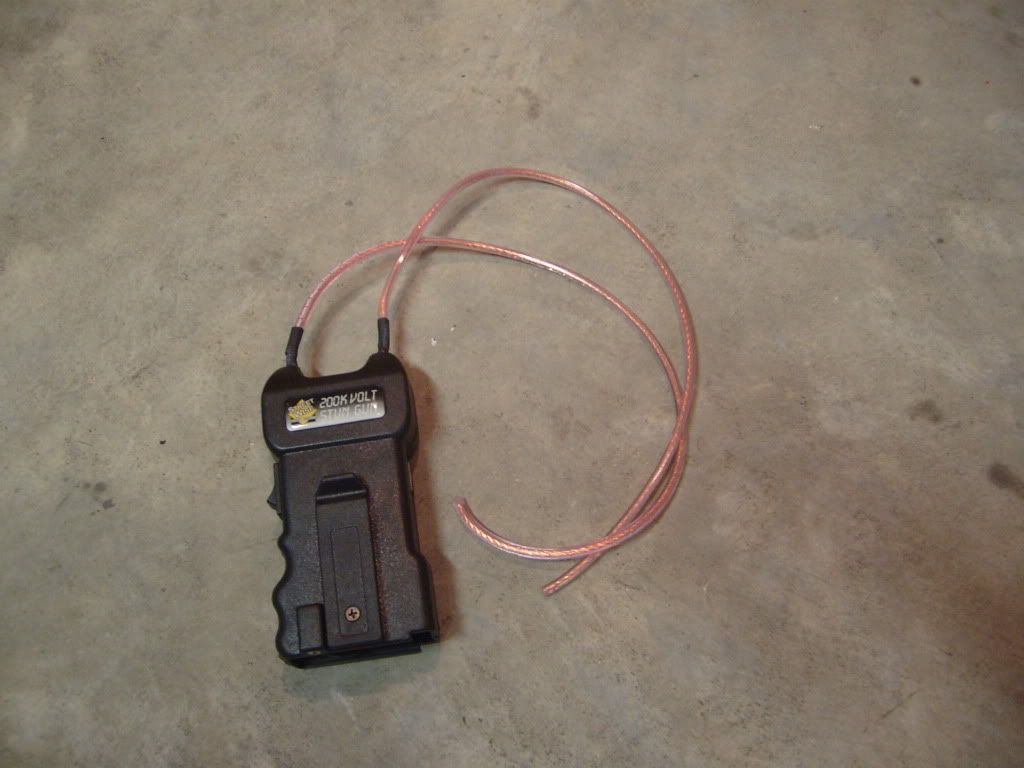
Awhile ago I found myself looking for a better ignition system. I searched on ebay "Stun gun" and I got pages of results. The one I got was the "Streetwise stun gun" which I paid $16.19 for. I just looked again and I saw one for under $16 shipped. I've had two of these and both have worked great. I don't have any affiliation to the company if you're wondering. Here's my review and a general how to for stun guns.
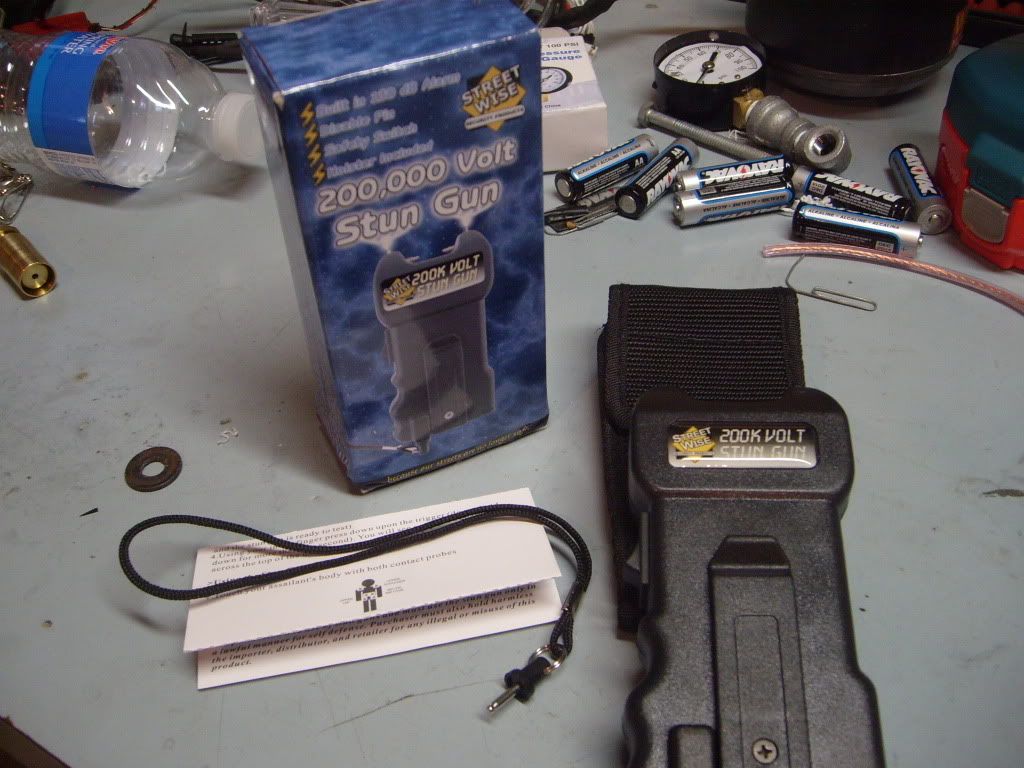
Features - This stun gun has a few unique features. One is the saftey pin, which is a pretty cool thing to show off. You can always leave it plugged in when you don't want to deal with it, and it's a great way to know it won't go off when it's unplugged. The other unique feature is the really loud alarm. I don't like this feature. The on/off switch has three positions, off/spark/spark&alarm. You could make sure to only have the switch to the second position, or you can disable the alarm like I did. I'll explain how later.
Now I'll get more into the how-to part of the thread. This will show you how to modify your average stun gun.
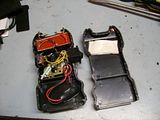
First we need to open the case. I did this by dremeling a notch by the battery compartment on each side, then taking a screwdriver and prying it open. I progressivly went up in screwdriver size and length up the case when popping it open. You have to go slow and take your time or you'll end up with a ruined case.
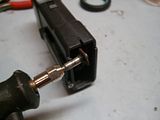
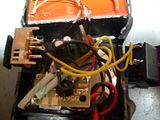
First thing I did was disable the alarm. This is best done cutting the [yellow iirc] wire from the top of the switch (the spark&alarm part), but you can also cut/desolder the blue wire connected to the actual alarm, which is what I did for this one. The only thing is that you can hear a very faint alarm even after I cut desoldered that wire. Don't know why.
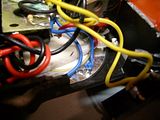
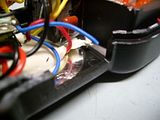
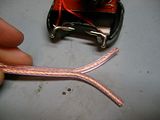
Now to attach your spark wires. I used some heavy-gauge speaker wire that looks cool and works great. I never got any shorting or shocking from touching the wires. You may want to use some high-voltage wire like the wire found in the back of a TV, but this stuff looks cool and works great for me. You'll find when soldering that when you get the big wire to properly attach, the little wires from inside the gun will come unsoldered. It's no big deal, all you have to do is let it cool then solder the small wires back on. I have some nice heatshrink that I put over it.
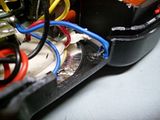
When I went to put the gun back together, the wires obstructed the fit. It's an easy fix though, just take a dremel or file and make the holes bigger. After I got it back together I used some CA glue (super glue/tire glue) to keep the electrodes from moving around and messing up the default spark gap. The default spark gap between the two should be kept to protect the stun gun from frying. The CA glue will also keep the case together at the top.
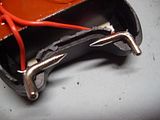


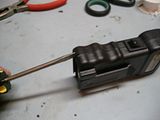
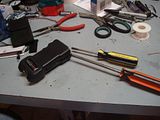
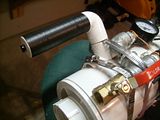
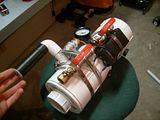
That's it! Here's the final product
Now being me, I ruined the momentary rocker switch that will make the stun gun spark with CA glue. There are two wires going into the switch so I thought this would be a great opertunity to make a trigger/handle.
That was my review/how-to on this lil stun gun. It works great and I highly recommend it. Now all I need to do on my gun is get that damn pressure gauge off and get a regulator... 8)
I'm uploading a video right now of the spark and I'll post it up in a minute. Let me know what you guys think.
Features - This stun gun has a few unique features. One is the saftey pin, which is a pretty cool thing to show off. You can always leave it plugged in when you don't want to deal with it, and it's a great way to know it won't go off when it's unplugged. The other unique feature is the really loud alarm. I don't like this feature. The on/off switch has three positions, off/spark/spark&alarm. You could make sure to only have the switch to the second position, or you can disable the alarm like I did. I'll explain how later.
Now I'll get more into the how-to part of the thread. This will show you how to modify your average stun gun.
First we need to open the case. I did this by dremeling a notch by the battery compartment on each side, then taking a screwdriver and prying it open. I progressivly went up in screwdriver size and length up the case when popping it open. You have to go slow and take your time or you'll end up with a ruined case.


First thing I did was disable the alarm. This is best done cutting the [yellow iirc] wire from the top of the switch (the spark&alarm part), but you can also cut/desolder the blue wire connected to the actual alarm, which is what I did for this one. The only thing is that you can hear a very faint alarm even after I cut desoldered that wire. Don't know why.


Now to attach your spark wires. I used some heavy-gauge speaker wire that looks cool and works great. I never got any shorting or shocking from touching the wires. You may want to use some high-voltage wire like the wire found in the back of a TV, but this stuff looks cool and works great for me. You'll find when soldering that when you get the big wire to properly attach, the little wires from inside the gun will come unsoldered. It's no big deal, all you have to do is let it cool then solder the small wires back on. I have some nice heatshrink that I put over it.
When I went to put the gun back together, the wires obstructed the fit. It's an easy fix though, just take a dremel or file and make the holes bigger. After I got it back together I used some CA glue (super glue/tire glue) to keep the electrodes from moving around and messing up the default spark gap. The default spark gap between the two should be kept to protect the stun gun from frying. The CA glue will also keep the case together at the top.


That's it! Here's the final product
Now being me, I ruined the momentary rocker switch that will make the stun gun spark with CA glue. There are two wires going into the switch so I thought this would be a great opertunity to make a trigger/handle.


That was my review/how-to on this lil stun gun. It works great and I highly recommend it. Now all I need to do on my gun is get that damn pressure gauge off and get a regulator... 8)
I'm uploading a video right now of the spark and I'll post it up in a minute. Let me know what you guys think.