Page 2 of 2
Posted: Fri Jan 27, 2012 7:02 pm
by Hawkeye
I'm trying to picture how this thing is going to be held...
Posted: Fri Jan 27, 2012 7:18 pm
by quark1980
Hawkeye wrote:I'm trying to picture how this thing is going to be held...
think "bullpup" style..

see what im thinking of?
Posted: Fri Jan 27, 2012 7:59 pm
by Hawkeye
I just meant that the upper part of the stock doesn't really look very face friendly.
Posted: Sat Jan 28, 2012 4:06 am
by quark1980
oh right.
that actually isnt that bad at all. the corners are not 90 degrees on the rear side of the stock..
when i get this thing to work as intended, i might add some padding there

im tinking maybe some adjustable cheeckrest, or something simular.
ill have to see how thinks work out really..
Posted: Mon Jan 30, 2012 5:11 pm
by quark1980
halfway done with the hammer... i need of a decent spring...
now i know why an inlinehammer inside a tube is definitely easyer :/
Posted: Mon Jan 30, 2012 6:30 pm
by Gun Freak
Haha nice. Mine was very simple. You can see the video in my thread.
Posted: Tue Jan 31, 2012 4:31 pm
by quark1980
nice.
for testing i might resort to rubber bands as a spring...
te hammer itself i quite sturdy...
now i just need to focus on the triggermechanism...
still looking for the right parts atm... i had the idea to make the handgrip and trigger 2 piece, wich can be mounted underneath the alu stock...
i need ot find a piece of u-profile with a inner spacing of 50mm tough...
Posted: Wed Feb 01, 2012 12:55 pm
by quark1980
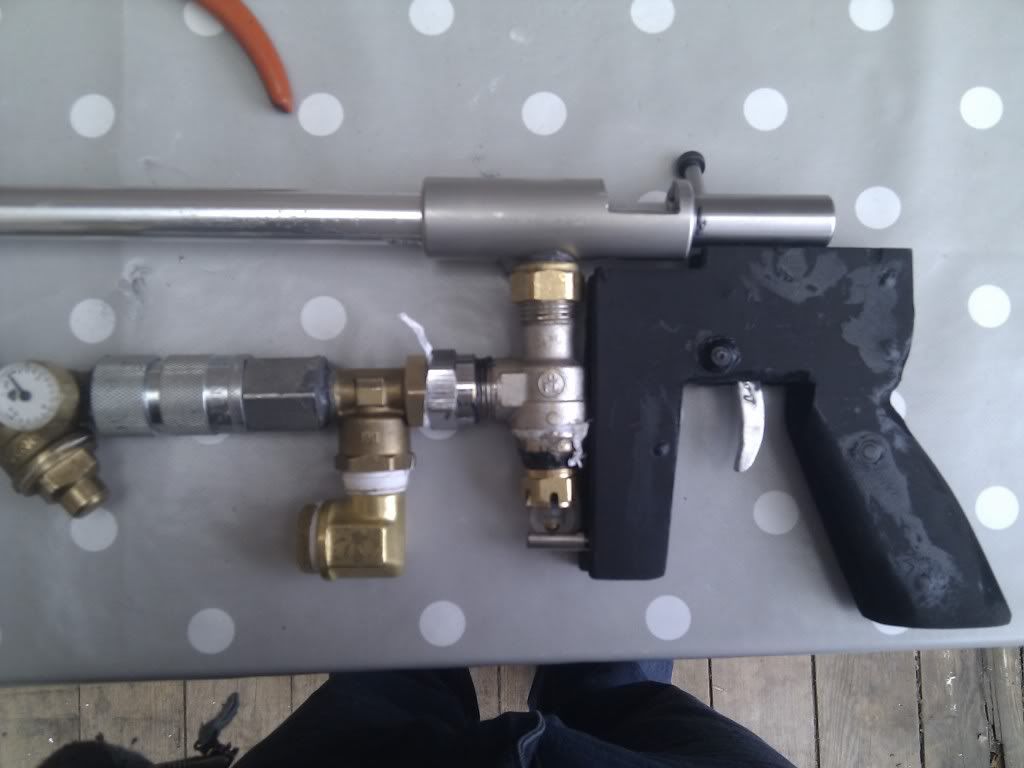
yay, finally finished my barrel

i found an aluminium tube with a stainless steel thicker endpiece on it.
i build the breach, and made a connection for the air inlet.
the stainless steel was kinda tough stuff to work on with only basic tools :S
it turned out quite good... would love to have accses to a mill and lathe tough
anyway, some pics for youre entertainment
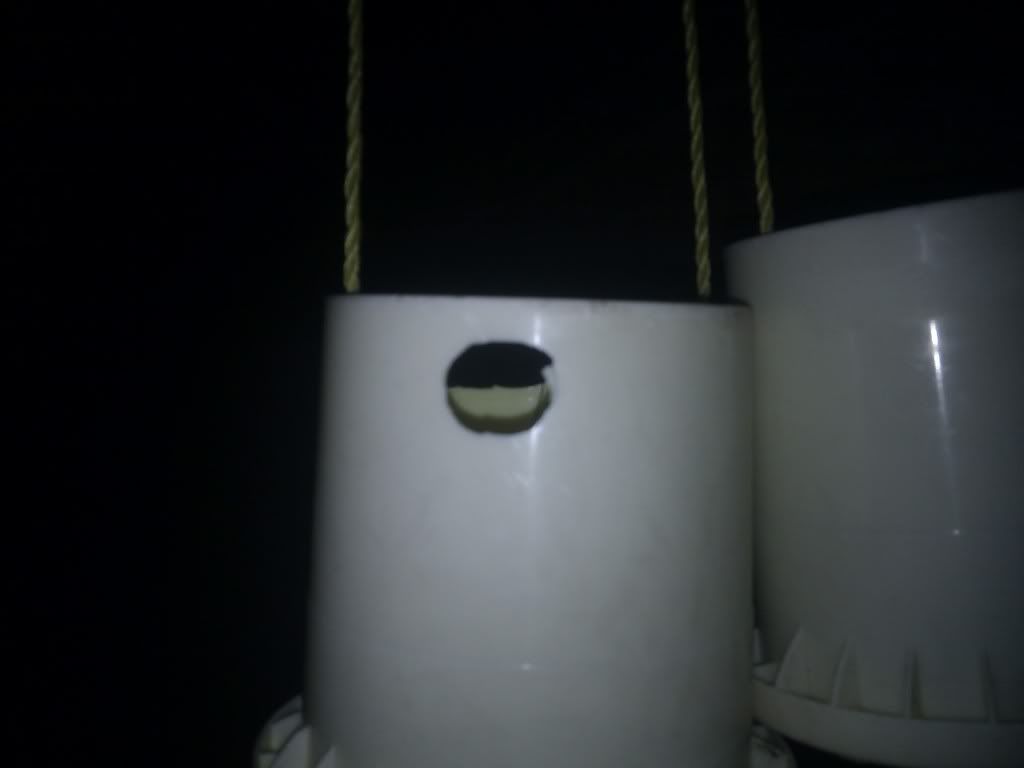
look into the breach, and see the inlethole:

breach closed:


the pieces:


the bolt should just push the projectile in front of the air inlet in the barrel... so it exits on the right side of the tube

Posted: Fri Mar 30, 2012 10:18 am
by quark1980
ok,
so i did something every first-timer does... changed my mind about the design.....

im gonna use the barrel and breach, and im going for a QEV type of gun to get used to building pneubs...
after a lot of reading, i now know that larger calibers dont go whell with hammer valves and lower pressures...
so redesign.
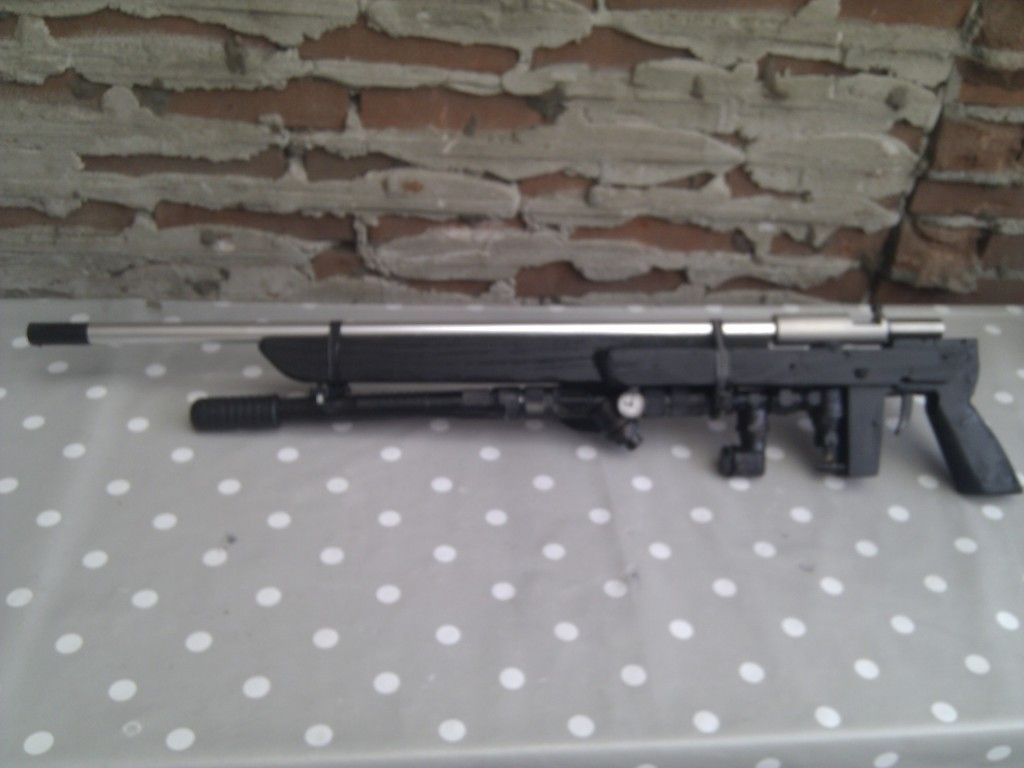
i wanted to build a selfcontained, single shot "sniper" suited for different types of ammo... the barrel is 15mm or 0.59 in inches...
selfcontained means it has a pump under the barrel wich can get the gun to pressure of 10 bars in approx. 25 strokes.. good enough for now...
nerf darts fit perfect..... good for testing....
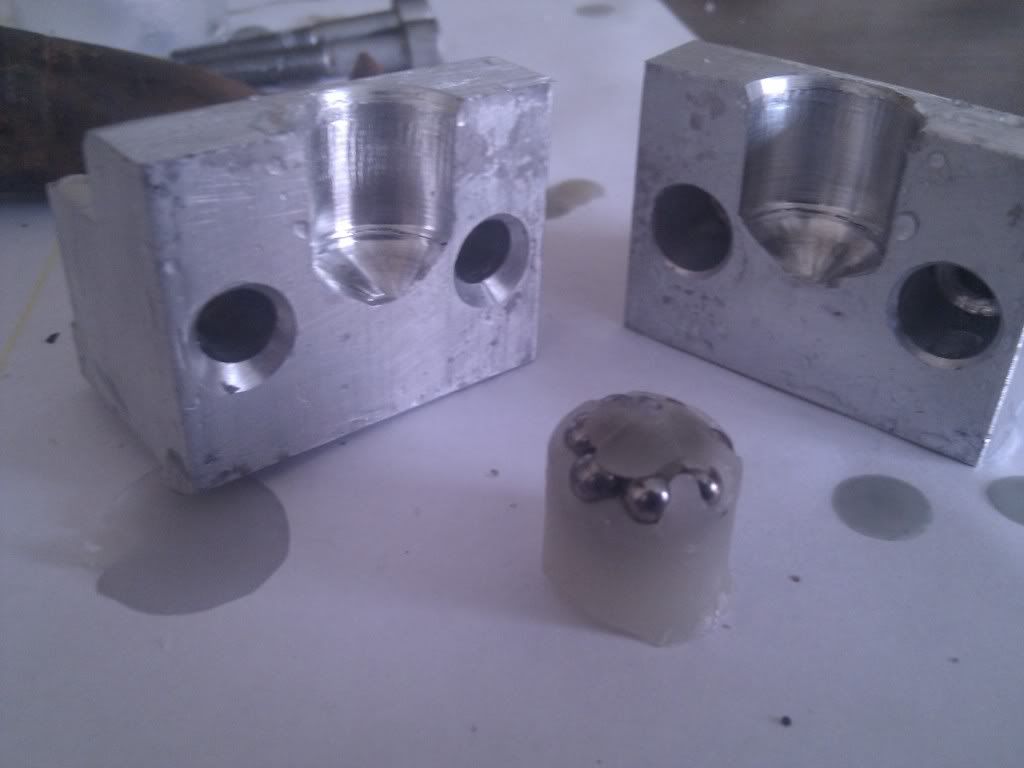
i also made a mould to make some "tougher ammo"
i found a pop off valve used in a compressor wich i have adapted to work like a QEV. only needed to epoxy a hole shut to make it work...
only downside is that my pilot valve is located a bit akward, but i think i found a decent solution...
now for some pictures, i only need to build a stock frame to hold every part together, but that quite easy to do, just need to find a nice piece of wood to make it...
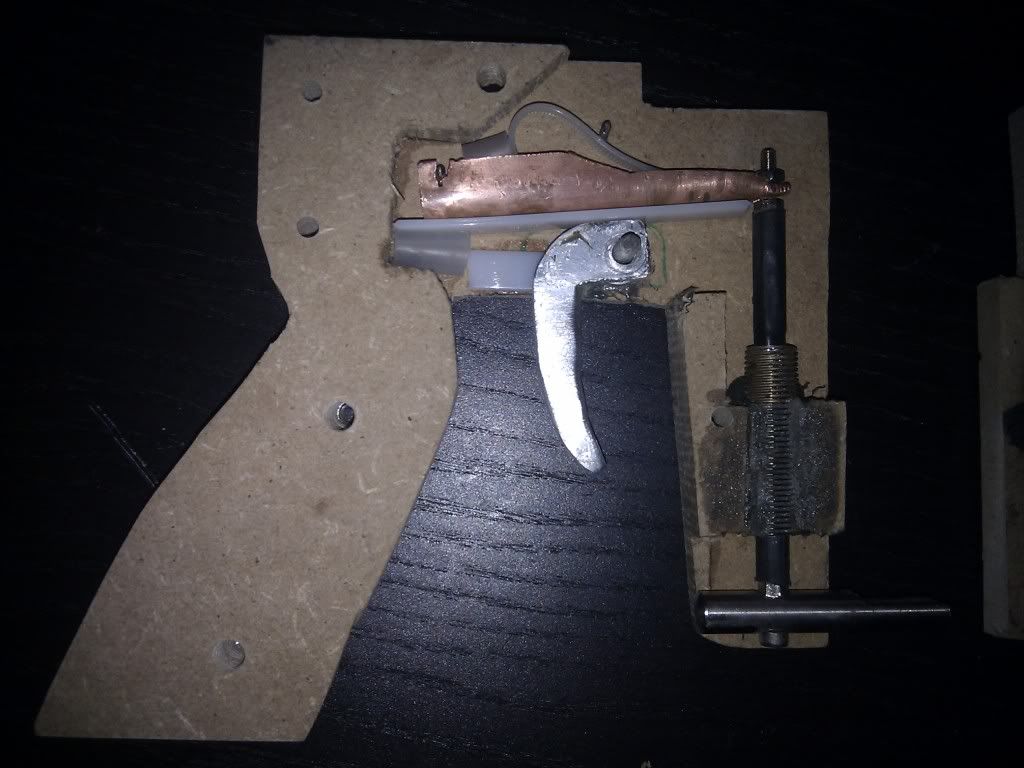
the trigger mechanism and its location, note the odd QEV vent valve:

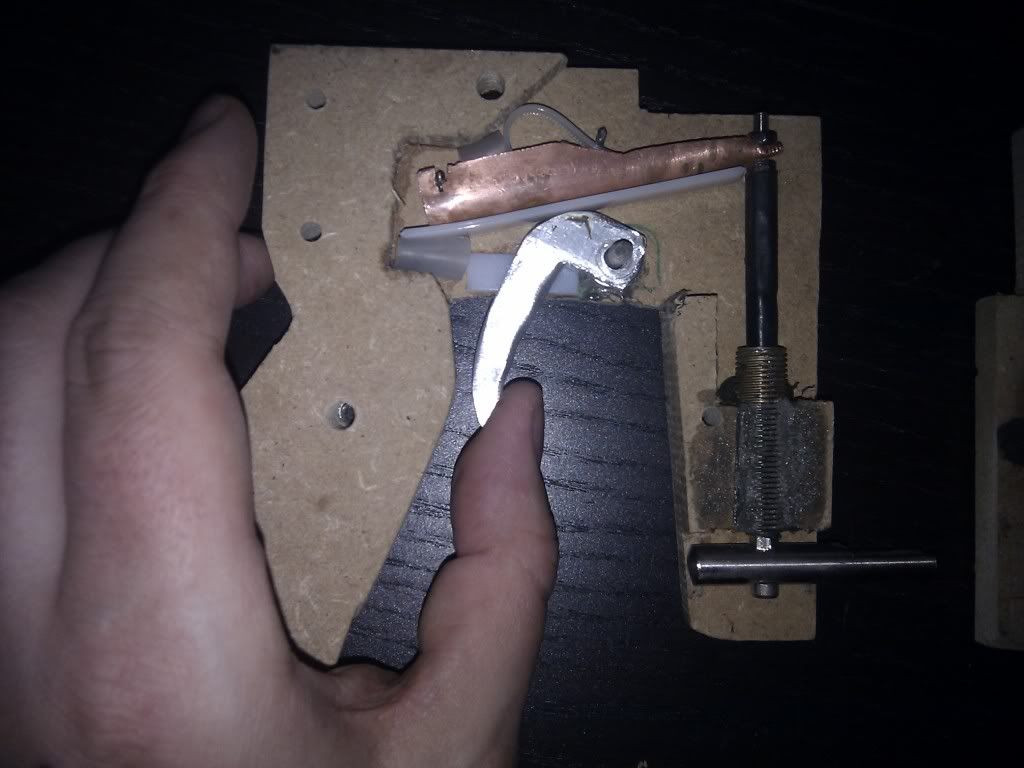
the trigger mechanism, speaks for itself i guess:
the mould, with a buck type of ammo... steel bb`s encased in wax...:

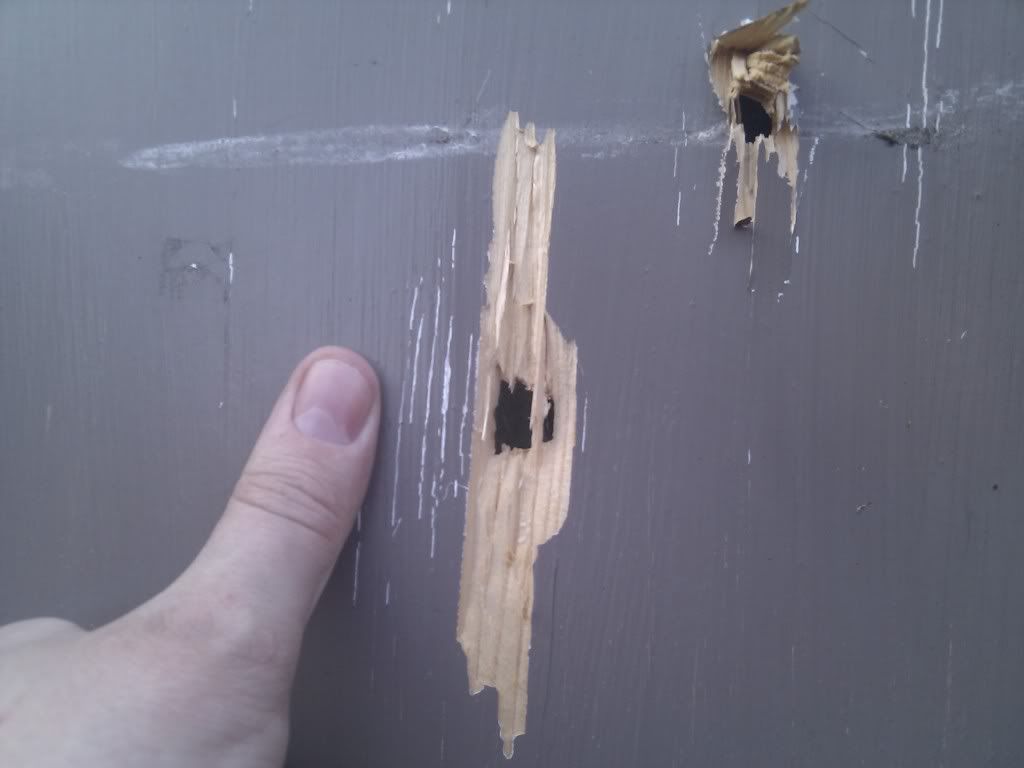
it does make a nice hole on just 8 bars, 4 mm plywood target:
and lastly, something what suprised me, a nerf dart shot at a plastic toy:
quite some damage for a piece of foam

Posted: Fri Mar 30, 2012 10:38 am
by killerbanjo
Really nice mate, come along scince you sent me those pics on the chat

Posted: Fri Mar 30, 2012 1:18 pm
by Brian the brain
I love that thing!!
Great job so far!
Just so you know, you could use a hammer valve with a QEV.
I did in Old Shatterhand and it works very well.
You must have a lot of dedication to cut out all that stainless!
Posted: Fri Mar 30, 2012 2:04 pm
by quark1980
brian, ik zal het maar even melden(that was dutch

), youre build with the inline pump was kinda inspiring my builds...
and yes, cutting the slot in the stainless was rather accompanied with some sweat
ik like to have something portable, with an "onboard" manner of compressing the needed gas
next build wil be either a 17mm bore(paintballs), or ill go pellet size....
either way, it will be semi.
need to first finish this one, build from mostly salvaged materials.
need to think of a decent way to build the rest of the stock, so the trigger mechanism will stay where its needed, in a way it still looks good...
Posted: Fri Mar 30, 2012 2:43 pm
by jackssmirkingrevenge
I love the way
this looks like it was cut with a hammer and chisel
coming along nicely.
Posted: Fri Mar 30, 2012 3:21 pm
by Brian the brain
Eindhoven de gekste!
Build with inline pump?
You must mean the lever action one...
Posted: Fri Mar 30, 2012 4:07 pm
by quark1980
yup, the lever action one 8)
@jsr:
close.... a file and a metalsaw (or is it called hacksaw?)
did use the angle grinder for the rougher pieces tough
now for the stock, i like wood, but i doenst need to look like a commercial airgun. and with my skill ill probably gonna paint it all black (and silver)
the trigger mechanism wil be slapped to the back, and will be sandwiched in between some wood/metal strips coming from the wooden barrel support, so it will be one rigid piece.
if all that is to my liking i want to make a detachable butstock...
at least, thats the plan... in not that great with wood, so its taking more effort to build the stock then it took building the valves...
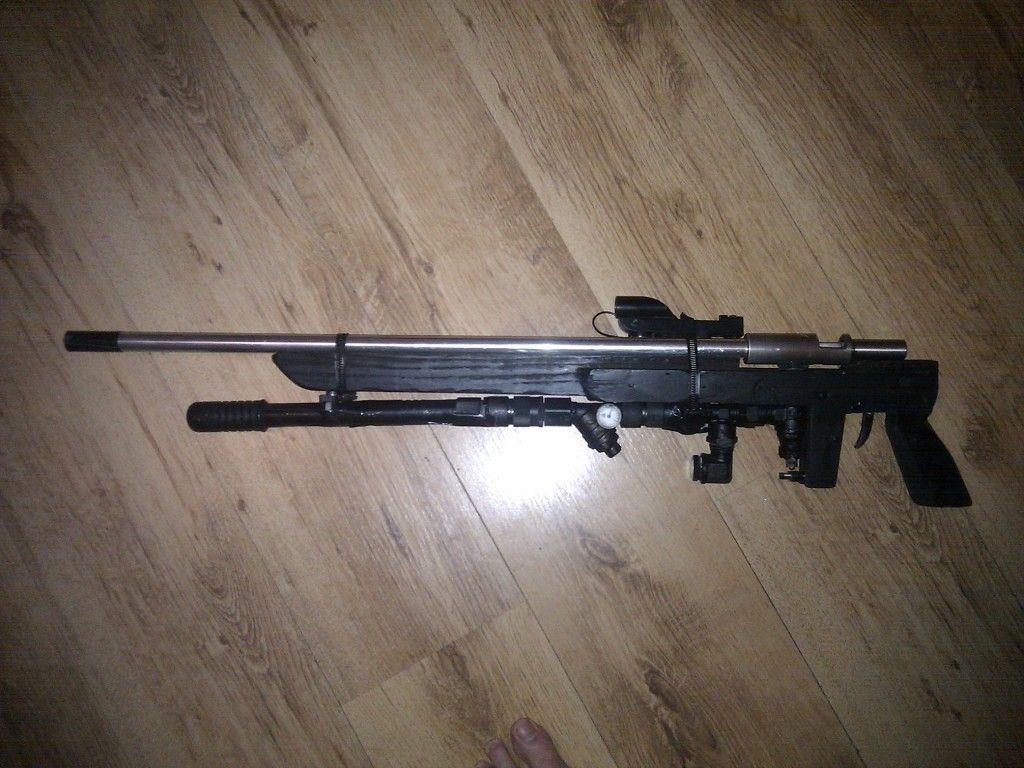
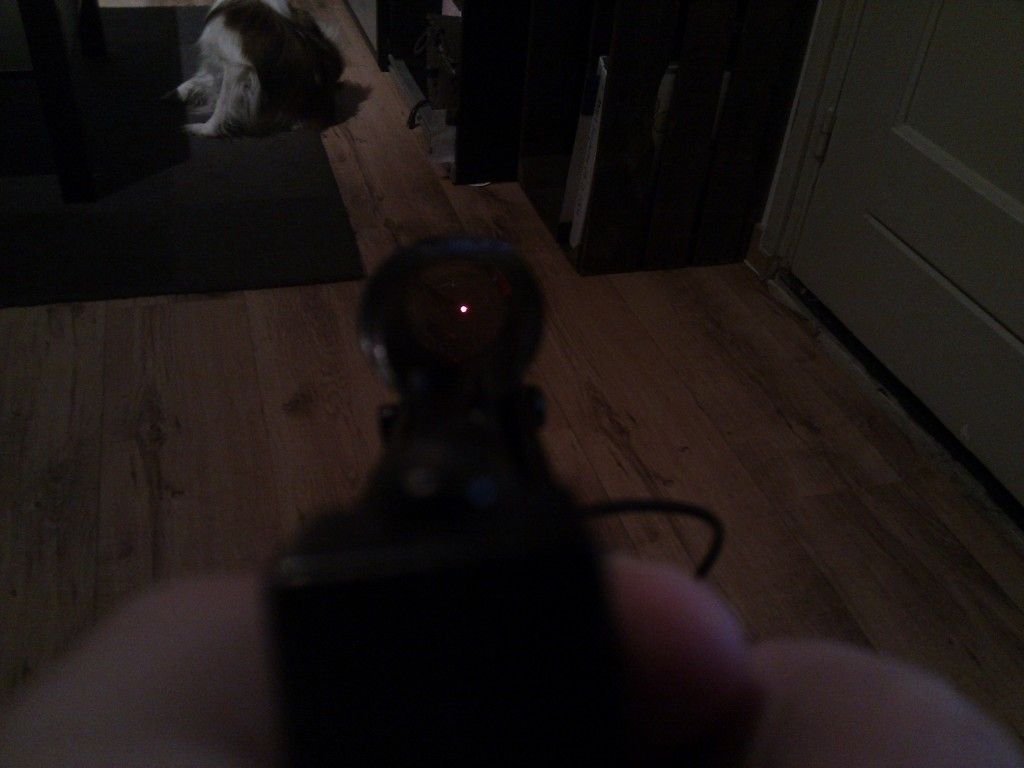
edit:
got me a shitty pic, need stock and need to repair my red-dot.
edit 2:
fixed the reddot... need to build a rail