how to make your own propane adapter (airsoft)
Posted: Sun May 25, 2008 5:49 pm
im back!!! and ive brought a few slight innovations with me (along with some major ones i will be releasing shortly) i took a vacation form spudfiles for most of the school year but now that its just about summer i should have a few new projects to share with you all very soon.
...DISCLAIMER...
the following information is meant for informational purposes only. i take no responsibility for anything you may do with the knowledge gained from this write up. propane can be dangerous and should be handled with care. i can not be held responsible for any damages or injures caused by this write up
....INTRO....
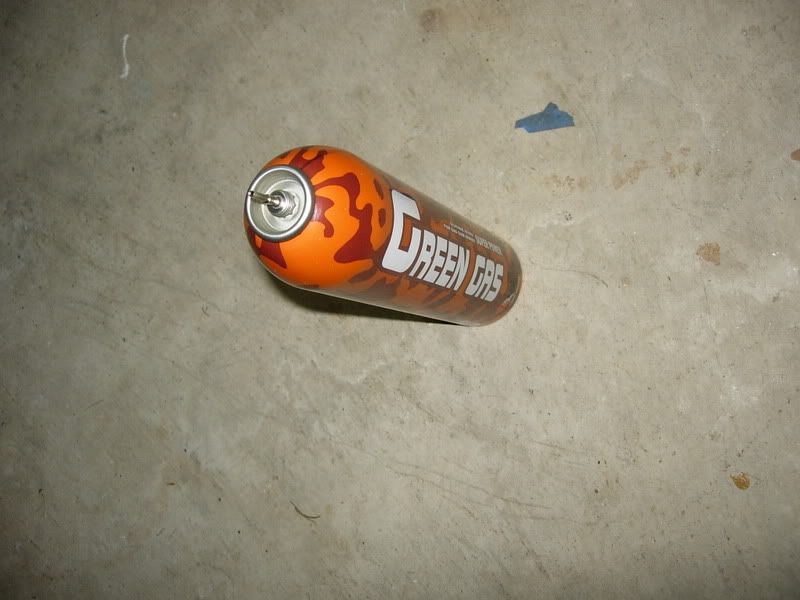
back on topic.... this would be my newly constructed propane adapter. if you have ever played airsoft before you should know what green gas and the ridiculous price they charge you for it. for all of you who haven't played green gas is essentially repackaged propane sold at about 3 times the price (ok sure... they add a little silicon but its still way over priced!!!) here is a picture of your standard can of the stuff....
<img src="http://i78.photobucket.com/albums/j85/i ... CN3321.jpg">
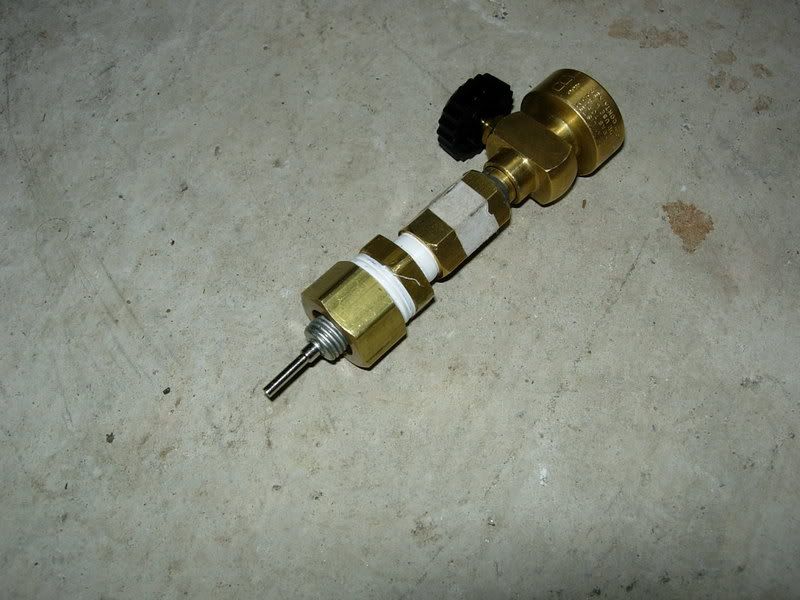
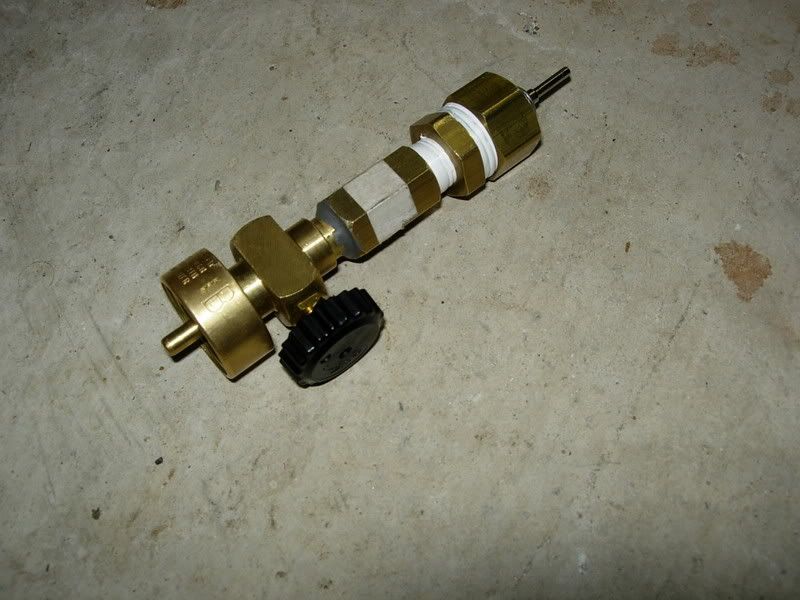
now a lot of airsofters realize green gas is a waste of money and buy custom made adapters for $20 - $30 that allow standard canisters of propane to be used with their guns. i have done the same thing except instead of using CNC machined aluminum my adapter was constructed with off the shelf brass parts. this means all of you could make for very own!
<img src="http://i78.photobucket.com/albums/j85/i ... CN3316.jpg">
<img src="http://i78.photobucket.com/albums/j85/i ... CN3317.jpg">
....PARTS....
benzomatic torch head (modified)
1/4" brass coupler
1/4" brass nipple
1/2" brass compression nut (you will probably need to buy the whole compression fitting)
1/2" to 1/4" brass bushing
empty can of green gas (MAKE SURE ITS COMPLETELY EMPTY!!!)
an o-ring (sorry i dont know which size)
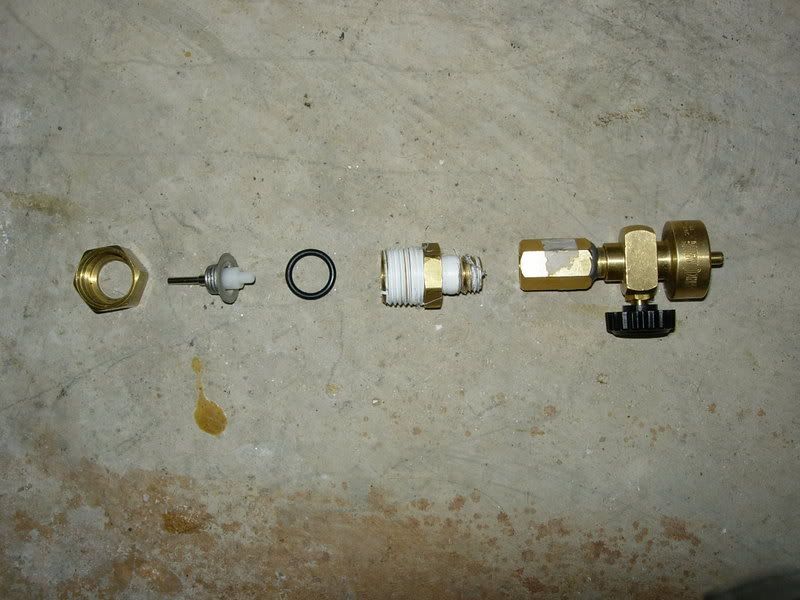
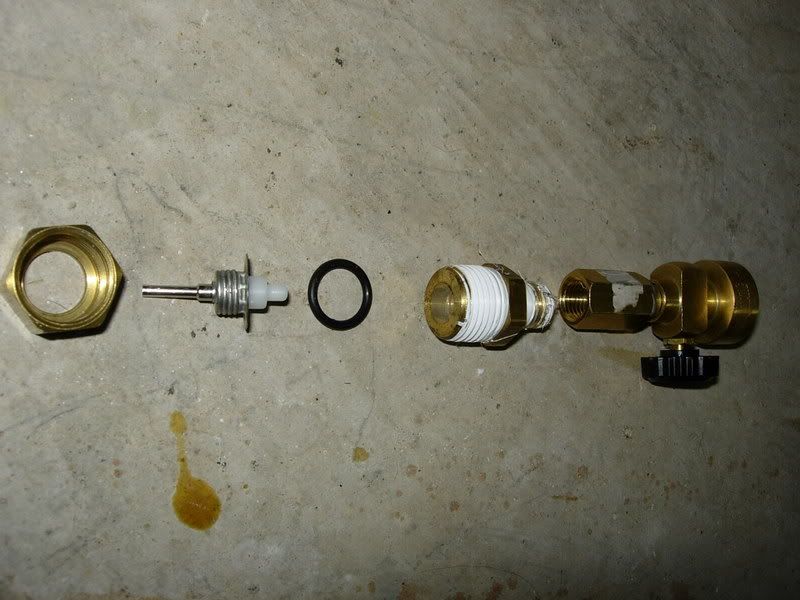
...EXPANDED VIEW...
<img src="http://i78.photobucket.com/albums/j85/i ... CN3318.jpg">
<img src="http://i78.photobucket.com/albums/j85/i ... CN3319.jpg">
...PROCESS....
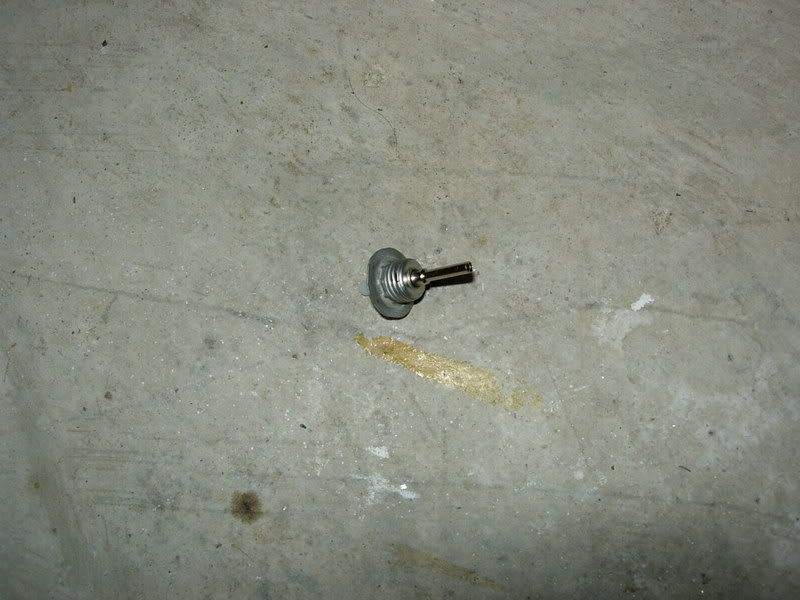
the first step is essentially decapitating a can off green gas but before you even attempt this make sure the nozzle is still good and there is no pressure still in the can (go outside and hold the nozzle down to be sure). after the can has been checked begin by peeling off the valve assembly with pliers there should be a lip you notice on the top of the can this is what you're trying to get off (you may need to start it with a flat head screw driver). the next step would be crushing the top a little bit so the valve assembly can be pulled out (if you are using the same green gas can as me you will notice the valve assembly is bigger than the opening in the can this is why it need to be crushed). now that the valve has been removed for the can it is safe to use power tools such as dremels. the idea is to cut the nozzle down to the size just small enough to sit inside the compression nut and make sure it has enough room to make a good seal with the o-ring! im sorry for the lack of picture in this section all i have is once shot of a finished valve...
<img src="http://i78.photobucket.com/albums/j85/i ... CN3320.jpg">
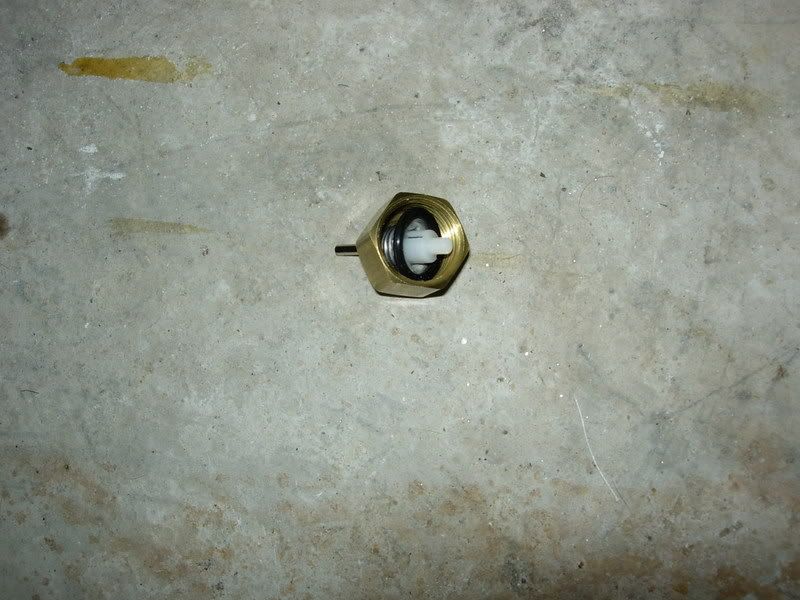
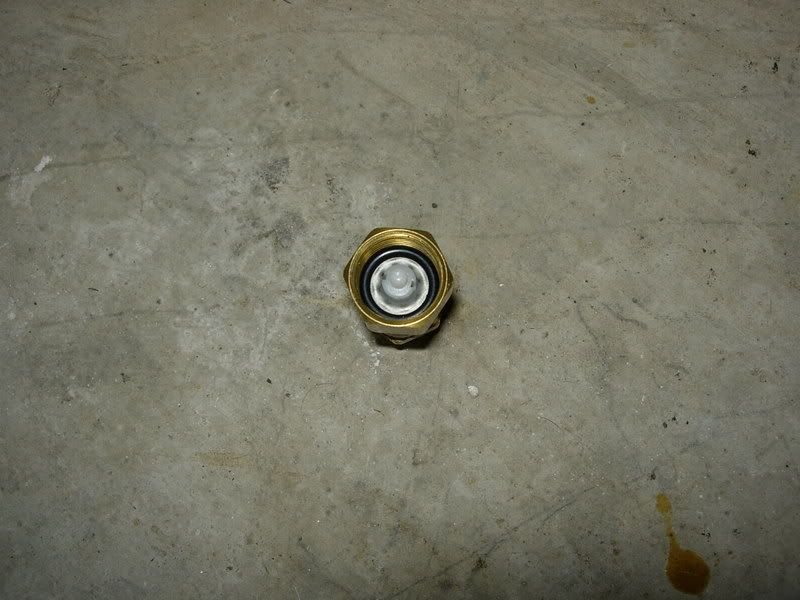
that was the hard part the rest is pretty much screwing fitting together. after the valve has been finalized (filled and flattened to make a good seal ) place it in the 1/2 compression nut then insert the o-ring. heres a pic of what it should look like...
<img src="http://i78.photobucket.com/albums/j85/i ... CN3322.jpg">
<img src="http://i78.photobucket.com/albums/j85/i ... CN3323.jpg">
next teflon the 1/2 to 1/4 bushing and screw it into the compression nut. notice how the brass bushing has an extremely smooth surface on it this is to make a good seal on the o-ring to be sure no propane escapes (propane leaks = very bad). tighten the two fittings just enough to make a good seal with the o-ring but not so tight that the o-ring might be dislodged or torn. then teflon the 1/4 nipple and screw it into the bushing. and finally screw the assembly into the propane adapter (the propane adapter is a propane torch head cut down with a 1/4 busing epoxied on) im not going to go into very much detail about the propane adapter itself because i am sure there is another how to on making one.
...USAGE...
1)screw in propane tank
2)turn valve all the way "on"
3)invert tank/valve/adapter and insert into mag or clip
4)hold in position for about 10 sec to be sure pressures have equalized
5)remove device from mag or clip and turn "off"
6)buy something awesome with all the money your saving from not buying green gas
optional step 7) add silicon to mag
because your using straight propane there is nothing in it to lubricate your gun this is not such a big deal if your using a crappy NBB from you local walmart but of your using a high end $100+ blow back you will want to lube up the moving parts every so often with silicon spray
***note - plz inform me if i have made any blatant grammatical errors (im sure they're in there lol)
...DISCLAIMER...
the following information is meant for informational purposes only. i take no responsibility for anything you may do with the knowledge gained from this write up. propane can be dangerous and should be handled with care. i can not be held responsible for any damages or injures caused by this write up
....INTRO....
back on topic.... this would be my newly constructed propane adapter. if you have ever played airsoft before you should know what green gas and the ridiculous price they charge you for it. for all of you who haven't played green gas is essentially repackaged propane sold at about 3 times the price (ok sure... they add a little silicon but its still way over priced!!!) here is a picture of your standard can of the stuff....
<img src="http://i78.photobucket.com/albums/j85/i ... CN3321.jpg">
now a lot of airsofters realize green gas is a waste of money and buy custom made adapters for $20 - $30 that allow standard canisters of propane to be used with their guns. i have done the same thing except instead of using CNC machined aluminum my adapter was constructed with off the shelf brass parts. this means all of you could make for very own!
<img src="http://i78.photobucket.com/albums/j85/i ... CN3316.jpg">
<img src="http://i78.photobucket.com/albums/j85/i ... CN3317.jpg">
....PARTS....
benzomatic torch head (modified)
1/4" brass coupler
1/4" brass nipple
1/2" brass compression nut (you will probably need to buy the whole compression fitting)
1/2" to 1/4" brass bushing
empty can of green gas (MAKE SURE ITS COMPLETELY EMPTY!!!)
an o-ring (sorry i dont know which size)
...EXPANDED VIEW...
<img src="http://i78.photobucket.com/albums/j85/i ... CN3318.jpg">
<img src="http://i78.photobucket.com/albums/j85/i ... CN3319.jpg">
...PROCESS....
the first step is essentially decapitating a can off green gas but before you even attempt this make sure the nozzle is still good and there is no pressure still in the can (go outside and hold the nozzle down to be sure). after the can has been checked begin by peeling off the valve assembly with pliers there should be a lip you notice on the top of the can this is what you're trying to get off (you may need to start it with a flat head screw driver). the next step would be crushing the top a little bit so the valve assembly can be pulled out (if you are using the same green gas can as me you will notice the valve assembly is bigger than the opening in the can this is why it need to be crushed). now that the valve has been removed for the can it is safe to use power tools such as dremels. the idea is to cut the nozzle down to the size just small enough to sit inside the compression nut and make sure it has enough room to make a good seal with the o-ring! im sorry for the lack of picture in this section all i have is once shot of a finished valve...
<img src="http://i78.photobucket.com/albums/j85/i ... CN3320.jpg">
that was the hard part the rest is pretty much screwing fitting together. after the valve has been finalized (filled and flattened to make a good seal ) place it in the 1/2 compression nut then insert the o-ring. heres a pic of what it should look like...
<img src="http://i78.photobucket.com/albums/j85/i ... CN3322.jpg">
<img src="http://i78.photobucket.com/albums/j85/i ... CN3323.jpg">
next teflon the 1/2 to 1/4 bushing and screw it into the compression nut. notice how the brass bushing has an extremely smooth surface on it this is to make a good seal on the o-ring to be sure no propane escapes (propane leaks = very bad). tighten the two fittings just enough to make a good seal with the o-ring but not so tight that the o-ring might be dislodged or torn. then teflon the 1/4 nipple and screw it into the bushing. and finally screw the assembly into the propane adapter (the propane adapter is a propane torch head cut down with a 1/4 busing epoxied on) im not going to go into very much detail about the propane adapter itself because i am sure there is another how to on making one.
...USAGE...
1)screw in propane tank
2)turn valve all the way "on"
3)invert tank/valve/adapter and insert into mag or clip
4)hold in position for about 10 sec to be sure pressures have equalized
5)remove device from mag or clip and turn "off"
6)buy something awesome with all the money your saving from not buying green gas
optional step 7) add silicon to mag
because your using straight propane there is nothing in it to lubricate your gun this is not such a big deal if your using a crappy NBB from you local walmart but of your using a high end $100+ blow back you will want to lube up the moving parts every so often with silicon spray
***note - plz inform me if i have made any blatant grammatical errors (im sure they're in there lol)