Page 1 of 2
HOW TO: Phototransitor Chronograph
Posted: Wed Jul 16, 2008 7:19 pm
by brplatz
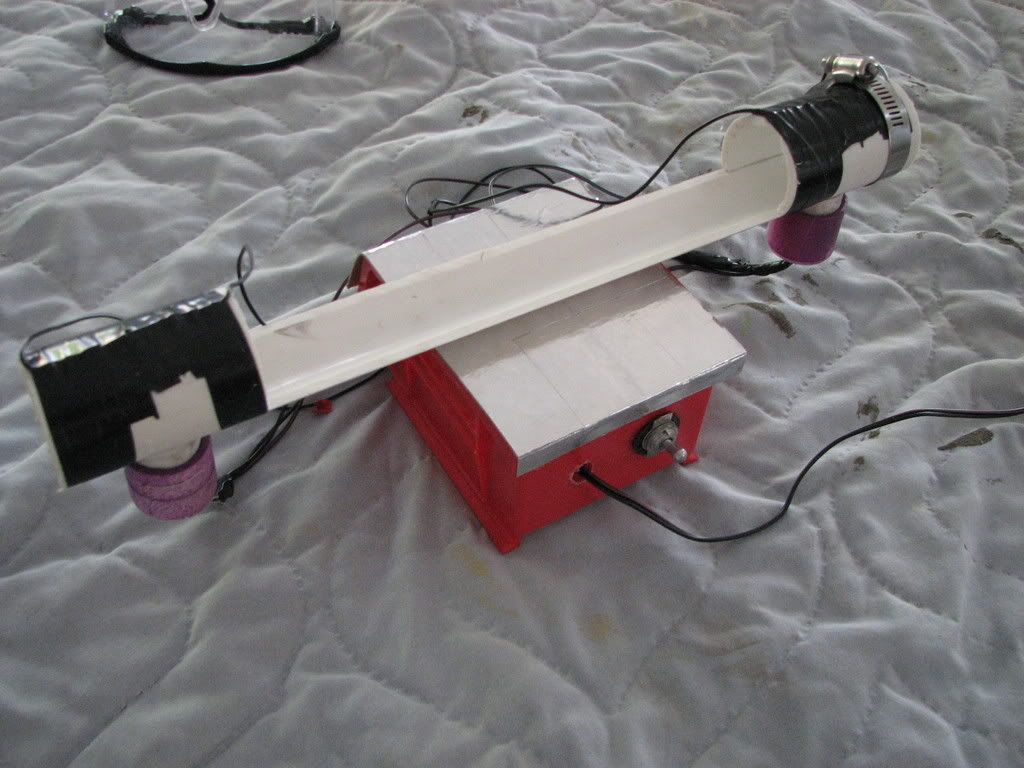
This Homemade Chronograph is partially built on Jim's homemade chronograph design (body) but we re did all the circuits for more consistant and accurate IR readings.
This is Jim's.
I have included our circuit schematics, which work amazingly well.
As you will see we did included IR LEDs. This along with the capacitor helps amplify the signature. There are also a 10k resistor on the phototrasitor circuit and 2 180k resistors on the IR LED circuit.
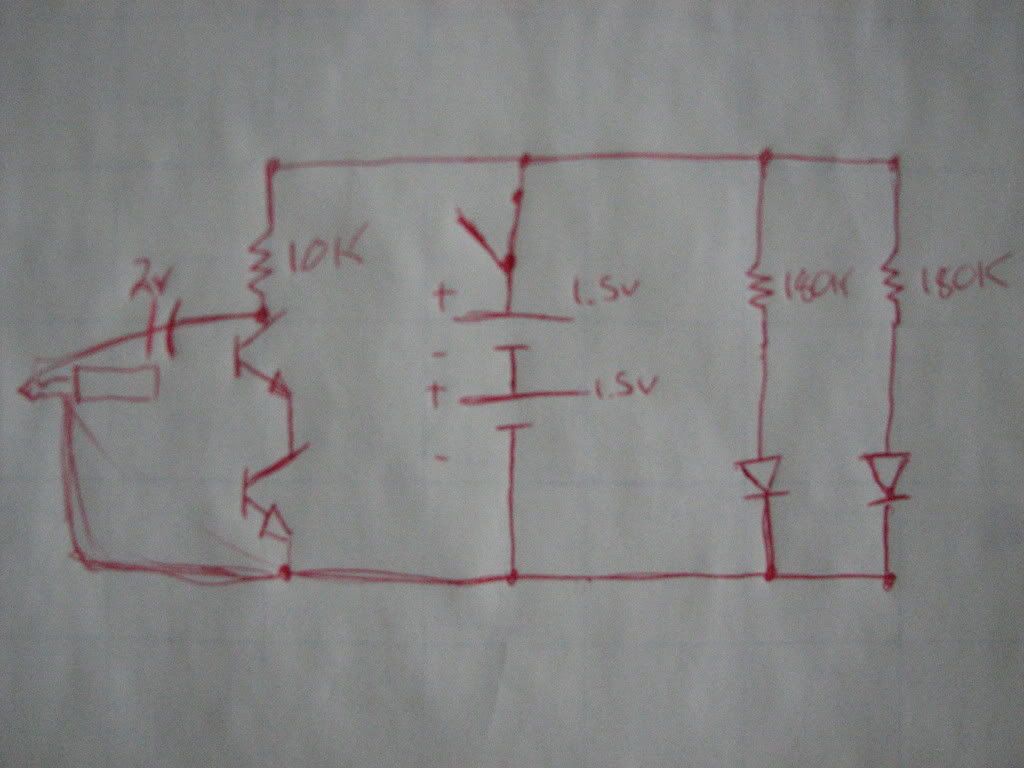
Kinda a rough drawing but its ok
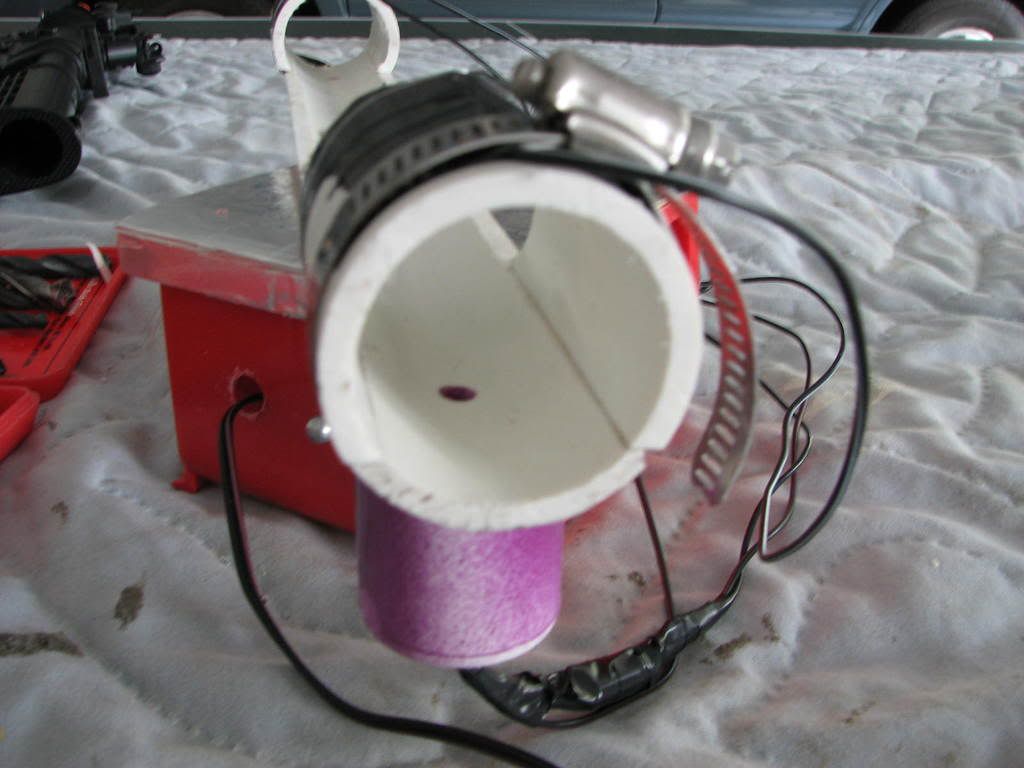
For the body we cut a piece of 1.5" pipe lengthwise, slim on one side and thicker on the other. then we cut pieces out of the thicker part to match the bottom. These are the holders for the IR LEDs.

Then we drilled 7/32" holes for the "light holes" and each LED hole which was 5mm or about 13/64" bit. These are attached by electric tape because I ran out of hose clamps, but soon to be replaced. The Phototransitor hubs are 3/4 pipe and caps but not glued together. This is for servicing if needed.
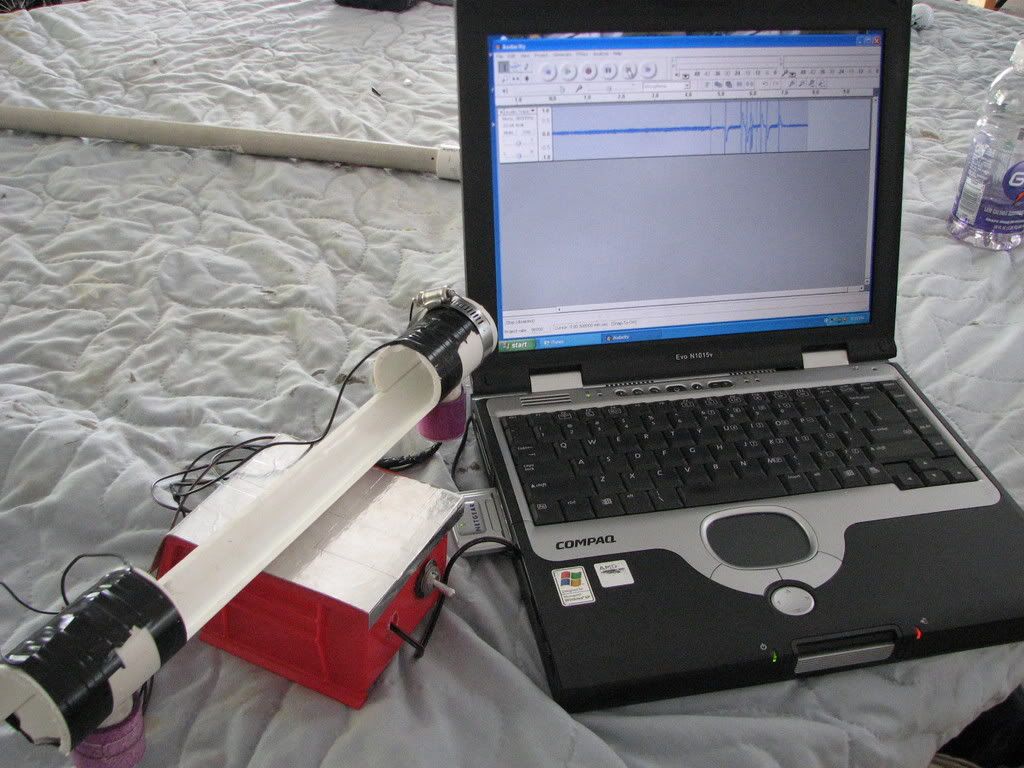
We use audacity for now and just get the distance between the two drops and divide 1 by it to get our FPS.
More pics to come

Posted: Wed Jul 16, 2008 8:07 pm
by brplatz
i forgot so no one gets mad, credit to the body design goes to Jim
Posted: Wed Jul 16, 2008 8:51 pm
by Pilgrimman
I'm impressed! I need to learn electronics!
Posted: Wed Jul 16, 2008 9:07 pm
by MrCrowley
Is it worth the hassle? Chrony's are only about $75US aren't they?
Posted: Wed Jul 16, 2008 9:16 pm
by VH_man
try 150 $US........
BTW, can you give a picture/part number of the phototransistors you used? i couldnt get mine to work at all off of ambient light........
Posted: Wed Jul 16, 2008 9:54 pm
by brplatz
http://www.radioshack.com/sm-infrared-p ... 49724.html
that's the phototransitor. i used IR LEDs because ambient light wasnt quite sufficient for me
http://www.radioshack.com/sm-high-outpu ... 62565.html
thats the IR LEDs i used.
$75 or $150 it doesnt matter to me cause i spent under $10 and as a high school student i dont have a ton of cash at the moment. And it was fun to design and build.
Posted: Wed Jul 16, 2008 9:57 pm
by MrCrowley
I'm sure you can get the F1 chrony's that go up to 7000fps on eBay for $70USD.
Hell even I can get them for $130NZD, a lot cheaper then $150USD.
Edit: Beaten.
Ah okay, $10 makes it all worth it then

Posted: Wed Jul 16, 2008 10:12 pm
by brplatz
Yes $10 is great and i still havent been able to test the extremes yet.
I need to test the speed, so i need a BBMG, and a high speed one, not sure how to test cause my dad wont let me shoot my hybrid

Posted: Thu Jul 17, 2008 2:24 pm
by brplatz
thats it?

i thought it was a pretty good idea even though it has been done before i didn't think it had been done this way exactly.
Posted: Thu Jul 17, 2008 2:54 pm
by starman
Sorry I missed this one somehow. Nice job setting it up. One quick question...without checking into the current specs for the IR LEDs, off the top of my head, the 180k resistors seem a little high valued for a 3 volt main supply. Again, just shootin' from the hip here. Are those LEDs especially low current draw?
However, obviously it's working for you, congratulations. I may have to whip something up similar...a little larger so it can accommodate golf balls.
Posted: Thu Jul 17, 2008 3:38 pm
by brplatz
One quick question...without checking into the current specs for the IR LEDs, off the top of my head, the 180k resistors seem a little high valued for a 3 volt main supply.
Actually its all we had at the time and it worked so we used them.
Im working on a larger projectile version also, it will also look much nicer
Posted: Thu Jul 17, 2008 3:59 pm
by starman
brplatz wrote: One quick question...without checking into the current specs for the IR LEDs, off the top of my head, the 180k resistors seem a little high valued for a 3 volt main supply.
Actually its all we had at the time and it worked so we used them.
Im working on a larger projectile version also, it will also look much nicer
Well at least your batteries will last a long time. You should probably be down around 100-330 ohm level or maybe even less. Again, it depends on the current at which they are rated.
Posted: Fri Jul 18, 2008 12:05 am
by brplatz
ill have to double check the current tomorrow, but I'm just enjoyin it right now!
its nice to have a fairly accurate reading for so cheap!
Posted: Sun Jul 20, 2008 12:39 am
by jimmy101
Nice job brplatz, it looks good.
BTW, are you sure the resistors aren't 180 Ohms and not 180K Ohms? LEDs are usually rated at something like 1.4V 25mA. Using the 3V supply means the resistor needs to drop 1.6V at 25mA. V=IR, V/I=R=1.6V/0.025A=64 Ohms. At 180,000 Ohms the LED would only have ~9 microamps going through it. I don't think an IR LED will light with that little current. If the thing is working with a 180K resistor then it is reading ambient light since the LEDs aren't lighting up at all.
On the drawing what is the "2V" that looks like a capacitor between the phototransistors and the plug?
Are you pluging this into a MIC or a LINE input?
Try recording the output from a TV remote control ...
Posted: Sun Jul 20, 2008 1:10 am
by starman
jimmy101 wrote:Nice job brplatz, it looks good.
BTW, are you sure the resistors aren't 180 Ohms and not 180K Ohms?
I've already alerted him to the resistor problem. I would be curious if he just temporarily disconnected the LEDs if it would continue to operate from ambient light as you suggested.
Unlike an incandescent bulb, an LED will still emit small numbers of photons with even a small current. The question however, is it enough for the phototransistors to detect it in a meaningful way in this application...I'm guess not....but never know until you try it.