3" Barrel Sealing Piston Valve
Posted: Sun May 01, 2011 6:22 pm
This is my first real spud gun (not counting a hairspray combustion and a ball valve pneumatic) and I spent alot of time planning and making it. I really wanted to make it nice and clean but still be able to fully access the piston as well as change barrels and chambers. Comments and suggestions are welcome and appreciated. Alot of credit needs to be given to Technician1002, Gun Freak, Lockednloaded, and Crna Legija for their help when I asked questions in the forum.
Specifications
Chamber- 40" of 3" PVC (removable)
Valve- 3" Piston
Trigger valve- 3/4" Ball Valve
Porting- 2" PVC with 2" female threads to connect to barrel
Fill valve - 1/4" ball with Quick Connect
Barrel- Interchangable from 1/2" to 3"
Here's an overview of the gun without a barrel on it.

Piston
It is a 2.5" coupler turned down on a lathe to fit perfectly. the end disks are made out of sheet pvc that was turned down to slide snugly into the coupler. a small piece of 2.5" pipe is glued inside of the coupler for support. The sealing face is 1/8" rubber from Mcmaster. A thin sheet of foam is behind the sealing face to allow the sealing face to flex to match the 2" pipe. The whole piston and half a tennis ball (bumper) is held together with 1/4" all thread.


Piston in back of valve

Fill Valve/Exhaust Valve
My fill valve is a 1/4" ball valve with a quick connect fitting. The exhaust valve is a 3/4" ball valve. This was the best way I could configure the exhaust valve, fill valve, and gauge. The O-ring groove to seal the back of the piston valve was cut on a lathe. The 8 holes for the retaining screws were drilled on a drill press and then tapped. I hand twisted a countersink bit in the holes on the inside of the 3" coupling to smooth them out and keep the o-ring from getting chewed up when taken out and put in. It seals perfectly and is very easy to take out and put in. The black foam inside of the 3" to 2" bushing is another bumper.


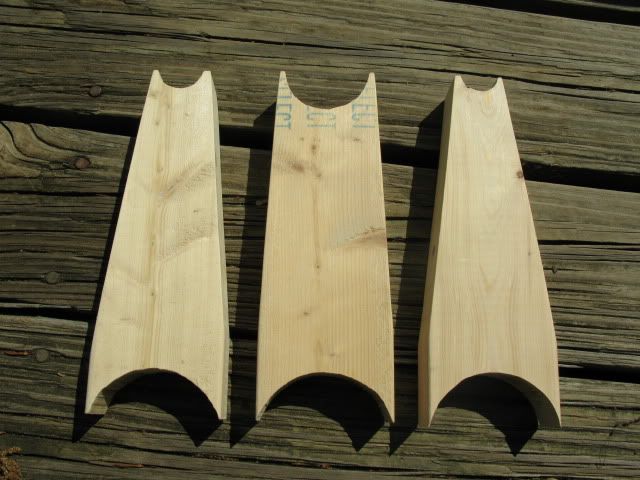
The barrel supports are made from 2x4's and are custom made for each size barrel. Below are barrel supports for 1", 2", and 3/4" barrels.
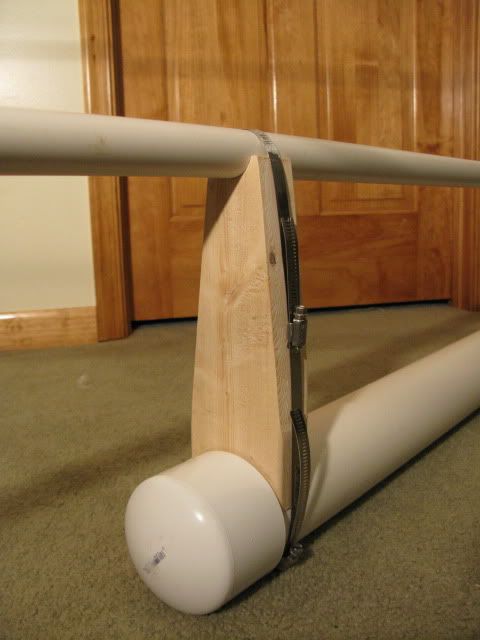
Barrel support with 1" barrel
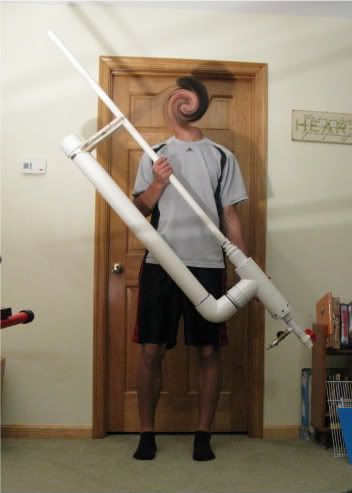
Gun overview with 1" barrel

Size reference picture. I am 6'3" tall.
No damage pics yet but they should be up within a week or so. Let me know what you all think. Any questions or picture requests gladly accepted. This gun is a beast and with it's tight piston tolerances can open with as little as 3 psi. I'm really excited that it works so well and can't wait to do some damage with it.
Specifications
Chamber- 40" of 3" PVC (removable)
Valve- 3" Piston
Trigger valve- 3/4" Ball Valve
Porting- 2" PVC with 2" female threads to connect to barrel
Fill valve - 1/4" ball with Quick Connect
Barrel- Interchangable from 1/2" to 3"
Here's an overview of the gun without a barrel on it.
Piston
It is a 2.5" coupler turned down on a lathe to fit perfectly. the end disks are made out of sheet pvc that was turned down to slide snugly into the coupler. a small piece of 2.5" pipe is glued inside of the coupler for support. The sealing face is 1/8" rubber from Mcmaster. A thin sheet of foam is behind the sealing face to allow the sealing face to flex to match the 2" pipe. The whole piston and half a tennis ball (bumper) is held together with 1/4" all thread.
Piston in back of valve
Fill Valve/Exhaust Valve
My fill valve is a 1/4" ball valve with a quick connect fitting. The exhaust valve is a 3/4" ball valve. This was the best way I could configure the exhaust valve, fill valve, and gauge. The O-ring groove to seal the back of the piston valve was cut on a lathe. The 8 holes for the retaining screws were drilled on a drill press and then tapped. I hand twisted a countersink bit in the holes on the inside of the 3" coupling to smooth them out and keep the o-ring from getting chewed up when taken out and put in. It seals perfectly and is very easy to take out and put in. The black foam inside of the 3" to 2" bushing is another bumper.
The barrel supports are made from 2x4's and are custom made for each size barrel. Below are barrel supports for 1", 2", and 3/4" barrels.
Barrel support with 1" barrel
Gun overview with 1" barrel
Size reference picture. I am 6'3" tall.
No damage pics yet but they should be up within a week or so. Let me know what you all think. Any questions or picture requests gladly accepted. This gun is a beast and with it's tight piston tolerances can open with as little as 3 psi. I'm really excited that it works so well and can't wait to do some damage with it.