Pneumatic Golf Ball Launcher - Piston Problems

Cannons powered by pneumatic pressure (compressed gas) using a valve or other release.
User avatar
rikukiakuchiki777
Specialist
Specialist
Posts: 110
Joined: Wed Feb 11, 2009 1:00 am
Location: Australia

Hey,
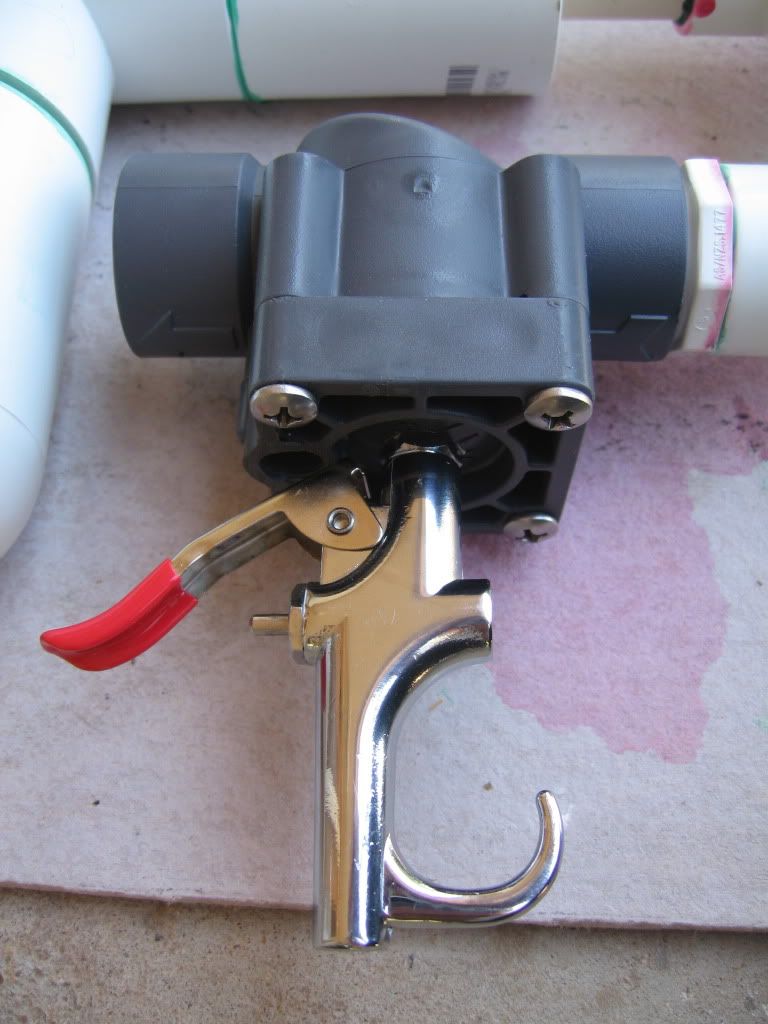
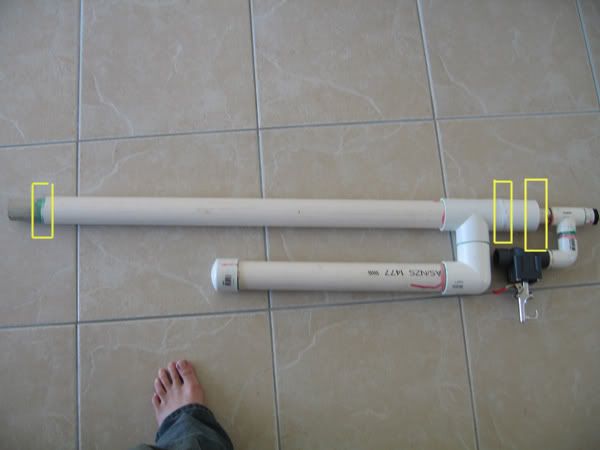
I'm currently in the process of making my first pneumatic - a barrel sealing piston cannon (shown below)

Image

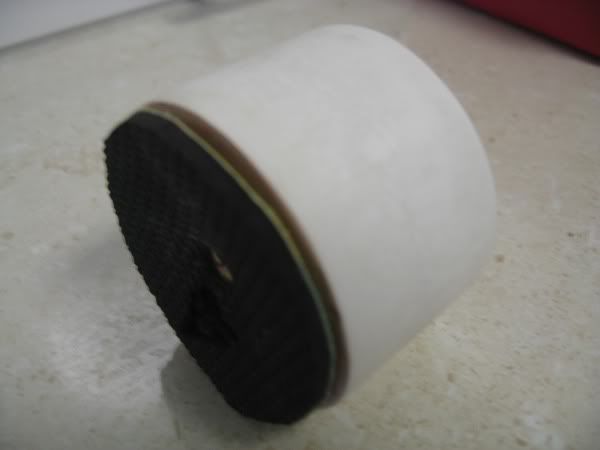
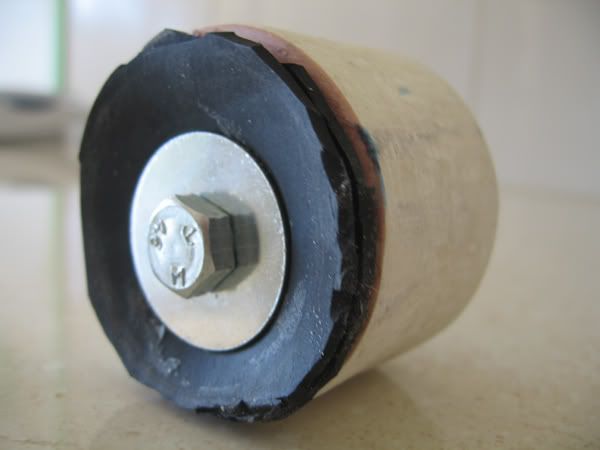
Now I fully intended to only post this project when it was 100% complete, however I encountered some problems when buying the parts - There was no way to make the piston serviceable, or at least as far as i can deduce. From MrCrowley's instructionable it appears that its possible to make the barrel detachable from the piston, so that the piston can be repaired/modified. Furthermore, this would allow for breach loading, which is something I would like to add to this cannon. How, is the big question I would like to ask, as I couldn't completely make sense of this, from the Instructable.
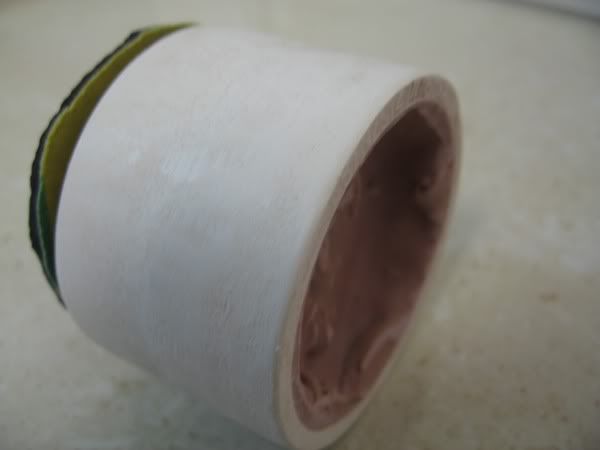
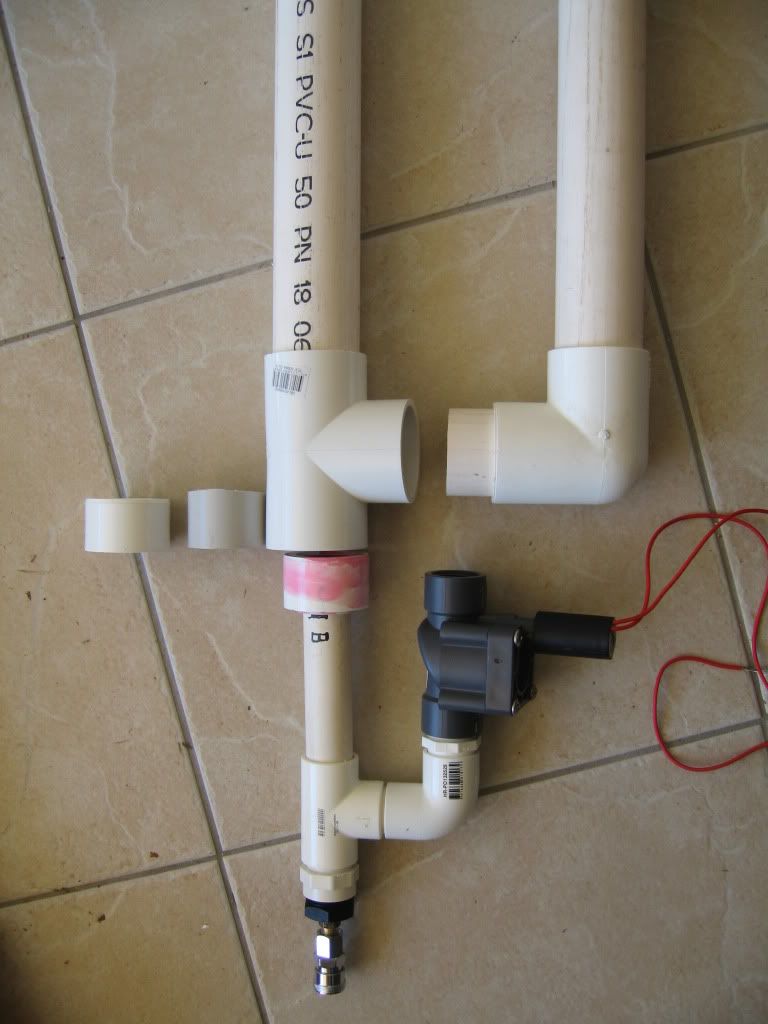
Also, another problem to note is that my Tee doesn't appear to give enough room for the piston to move back and forth between the barrel and the back of the piston enclosure. Seen Below:
Image
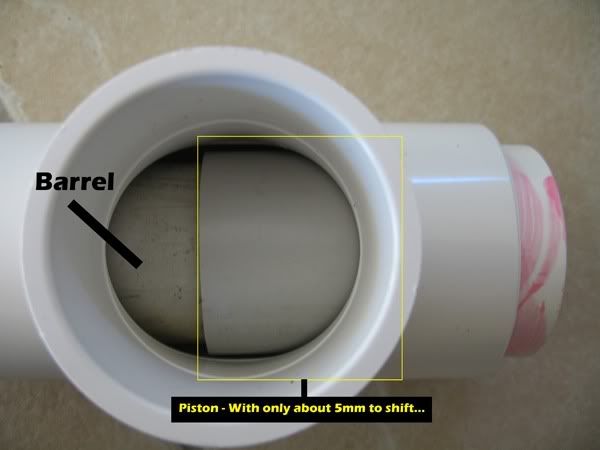
The piece with primer on it is a 50x40mm reducer. I was considering grabbing a coupler to join this reducer to the Tee instead of placing the reducer inside the Tee. This would create more room for a piston however may be a weaker area because there would be little surface area joining the coupler to the Tee
Any ideas?
User avatar
MrCrowley
Moderator
Moderator
Posts: 10078
Joined: Fri Jun 23, 2006 10:42 pm
Location: Auckland, New Zealand
Been thanked: 3 times

Hmm...where's your piston? Can you take pictures of it, I don't see anything with a sealing face etc...

To make my piston valve serviceable I...

Got a piece of 2" pipe about 15cm long (it says in the instructable), I then glued that inside the back of the tee, so about 7cm of 2" pipe was sticking out. I then glued a 2" female adapter on this 2" pipe. This female adapeter had female 2" threaded, which is big enough to allow the piston to fit through.

My piston fits perfectly inside the 2" piece of pipe, it can fit through the 2" female threaded adapter which is also glued to the pipe. I then got a 2"x1" malexfemale threaded adapter.

This has 2" male threads on one side, and 1" female threads on the other side. The 2" male threads would thread in to the 2" female adapter, and my pilot setup (pilot valve, fill valve) would thread on to the 1" female side.

The important thing is to find a 2" female threaded adapter that fits OVER 2" pipe, you don't want it to fit inside the tee, you want it to fit OVER 2" pipe...so the adapter should be the same inside and outside diameter as the tee. This will allow a piston that fits in 2" pipe to be serviceable.

BTW, which instructable? I have 2.
User avatar
rikukiakuchiki777
Specialist
Specialist
Posts: 110
Joined: Wed Feb 11, 2009 1:00 am
Location: Australia

This female adapeter had female 2" threaded, which is big enough to allow the piston to fit through.
The piston sits inside the Tee itself, not the 2" pipe. The barrel is some electrical conduit (1.7" ID) that fits perfectly inside 2" pipe. The 2" barrel is to be glued into the Tee, with the conduit protruding through. This is the pipe the piston is to seal against. As I said before, our piston sits inside the Tee not the pipe. If your piston was inside the 2" pipe, how did the piston seal against the barrel?

This is the instructable I was looking at.

I've yet to complete the piston but as soon as its done I'll add some photos
User avatar
spudtyrrant
Corporal
Corporal
United States of America
Posts: 550
Joined: Fri Jan 02, 2009 6:10 pm

rikukiakuchiki777 wrote:
This female adapeter had female 2" threaded, which is big enough to allow the piston to fit through.
The piston sits inside the Tee itself, not the 2" pipe. The barrel is some electrical conduit (1.7" ID) that fits perfectly inside 2" pipe. The 2" barrel is to be glued into the Tee, with the conduit protruding through. This is the pipe the piston is to seal against. As I said before, our piston sits inside the Tee not the pipe. If your piston was inside the 2" pipe, how did the piston seal against the barrel?

This is the instructable I was looking at.

I've yet to complete the piston but as soon as its done I'll add some photos
yeah Mr.Crowley wrote that instructable lol. The piston slides inside pipe because you have a barrel that is smaller than the inside diameter of the pipe your piston slides in. if you have any questions he would be the one to ask(since he wrote it)
User avatar
MrCrowley
Moderator
Moderator
Posts: 10078
Joined: Fri Jun 23, 2006 10:42 pm
Location: Auckland, New Zealand
Been thanked: 3 times

Yeah that's why you can't make it serviceable and I did, because my piston is inside 2" pipe and yours is inside the tee. That's the problem.

My piston fits in 2" pipe, diameter of about 60mm I think, it seals against a 48mm O.D barrel...pletny of area difference.

edit:
This is what mine looks like:
Image

That piece of 2" pipe on the left side, is what glues in to the tee. The piston travels in that.

That's how I did it.
User avatar
rikukiakuchiki777
Specialist
Specialist
Posts: 110
Joined: Wed Feb 11, 2009 1:00 am
Location: Australia

Here is the updated piston.
Image
Image
I sanded down the edge of the 50x40mm reducer, filled it with a gap filler and glued some rubber from a mouse-pad down. It slides nicely inside the Tee so i'll glue it and leave it overnight. ~40psi tests in the morning, with *hopefully* damage pics! :D

edit:
these photo's were taken before i stuck the mat down with glue...hence the peeling at the edges
User avatar
MrCrowley
Moderator
Moderator
Posts: 10078
Joined: Fri Jun 23, 2006 10:42 pm
Location: Auckland, New Zealand
Been thanked: 3 times

Your piston will be very heavy with that filler, so make sure you have a very strong bumper to take the force. It helps that your piston doesn't move far back, but 5mm is definitely choking flow, 20mm would be better.

Also, that mouspad might not work for two reasons:

1: It's too porus, like a sponge. It will probably leak.
2: It's not bolted down, no doubt in my mind that the sealing face will eventually be ripped off. You really need a bolt and washer to hold it down with launchers this big.
User avatar
rikukiakuchiki777
Specialist
Specialist
Posts: 110
Joined: Wed Feb 11, 2009 1:00 am
Location: Australia

Hey Mr Crowley,
New update on the piston with different rubber used. Its a type of bike tire rubber, two sheets held together tightly by a nut,bolt, and washer.
Hopefully this is a better approach...
Image
User avatar
c11man
Corporal 3
Corporal 3
Posts: 783
Joined: Fri Feb 06, 2009 4:37 pm
Location: Wisconsin, USA

piston is looking better. but do not expect any inpressive power with that small of travel.
User avatar
rikukiakuchiki777
Specialist
Specialist
Posts: 110
Joined: Wed Feb 11, 2009 1:00 am
Location: Australia

c11man wrote:do not expect any inpressive power with that small of travel.
I've fixed the pistons travel distance, it now moves approximately 15-20mm back. The only issues now are possible leaks, whether the sprinkler valve operates as intended, and whether the piston seals against the barrel. As the piston is not serviceable I'm hoping that it all works, however most of the important components (also most expensive :roll:) are threaded on and thus reusable.
User avatar
c11man
Corporal 3
Corporal 3
Posts: 783
Joined: Fri Feb 06, 2009 4:37 pm
Location: Wisconsin, USA

well did you cut the barrel square? sand it smoth? modd the sprimler right?
User avatar
MrCrowley
Moderator
Moderator
Posts: 10078
Joined: Fri Jun 23, 2006 10:42 pm
Location: Auckland, New Zealand
Been thanked: 3 times

I would also epoxy the washer and bolt up on the sealing face of your piston...most of the time it will leak out of it.
User avatar
rikukiakuchiki777
Specialist
Specialist
Posts: 110
Joined: Wed Feb 11, 2009 1:00 am
Location: Australia

c11man wrote:well did you cut the barrel square? sand it smoth? modd the sprimler right?
Yes, yes and yes. The barrel was cut with a circular power saw and sanded smooth so it is as straight as possible. The sprinkler valve had a blowgun tapped into it, done by an engineering firm. Fairly sure it was done correctly. This is it:


Image
User avatar
rikukiakuchiki777
Specialist
Specialist
Posts: 110
Joined: Wed Feb 11, 2009 1:00 am
Location: Australia

So it works... sort of. I ran it to about 50 psi, however it only works at around 30-40psi. There are multiple leaks, however all of which can be fixed. It leaks in the areas highlighted below:

Image

There are 2 leaks in the pilot area, so the gun rarely works as it often vents prematurely. I did however get multiple successful shots off, two of which had a golf ball in the barrel so overall its a success in my books. I'll fix the leaks with epoxy or something and post an update.

Oh thanks for the help with the piston everyone, i believe it works beautifully :D
User avatar
tghhs
Specialist
Specialist
Posts: 176
Joined: Wed Dec 31, 2008 11:01 pm

So did you manage to make the piston servicable? Also i did you manage to get a good bumper for that piston?
MrCrowley wrote:
My piston fits perfectly inside the 2" piece of pipe, it can fit through the 2" female threaded adapter which is also glued to the pipe. I then got a 2"x1" malexfemale threaded adapter.
Mabe australian fittings are different in AUS or just that the standard pn 18 ones found in Bunnings are chunkier, but i tried this method once and found that the threads intruded ~ 1mm into the pipe not allowing my piston through. Was the piston o-ringed so it was able to squeeze through?

BTW I like this VERY much! Good job!
Post Reply

Create an account or sign in to join the discussion

You need to be a member in order to post a reply

Create an account

Not a member? register to join our community
Members can start their own topics & subscribe to topics
It’s free and only takes a minute

Register

Sign in

  • Similar Topics
    Replies
    Views
    Last post
  • golf ball problems
    by evileye250 » » in Ammo & Materials
    4 Replies
    3074 Views
    Last post by CS
  • Golf ball launcher
    by Sohail_L » » in Pneumatic Cannons
    13 Replies
    12512 Views
    Last post by wdr0
  • Here is my finished golf ball launcher
    by gwoloshyn » » in Pneumatic Cannons
    13 Replies
    5607 Views
    Last post by Collo
  • somewhat-mini golf ball launcher
    by grock » » in Pneumatic Cannons
    3 Replies
    917 Views
    Last post by jeepkahn
  • Golf ball Launcher w/ compound bow... HELP!!!
    by mysticjbyrd » » in Off-Topic Hobbies
    16 Replies
    6018 Views
    Last post by mysticjbyrd