M79 Thumper help

Boom! The classic potato gun harnesses the combustion of flammable vapor. Show us your combustion spud gun and discuss fuels, ratios, safety, ignition systems, tools, and more.
eXodus31337
Private
Private
Posts: 14
Joined: Wed Apr 27, 2011 10:37 pm

Wed Apr 27, 2011 10:55 pm

This is my first attempt at making a potato cannon. Esthetically, it's coming up nicely. What I'm having trouble with is the combustion. I understand the chamber is rather small and would not provide very much power, but I'm failing to even get a popping noise.

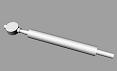
If I fill the tube with lighter refill fuel, stick a paper towel wad at the top and then approach a flame near the bottom hole, all I get is a gentle flame coming out of the hole. It doesn't propagate back inside and generates no combustion.

If I leave the tube open and approach a flame from the top, then I get a flame inside the tube to burn slowly. No quick combustion.

What am I doing wrong here? There are pistol guns doing fine with way smaller chambers :?
Attachments
2011-04-27 23.24.51.jpg
2011-04-27 23.24.27.jpg
2011-04-27 23.23.40.jpg
User avatar
Crna Legija
First Sergeant 2
First Sergeant 2
Posts: 2333
Joined: Sun Jul 20, 2008 5:14 am
Location: australia

Wed Apr 27, 2011 10:59 pm

you are using to much fuel, since your chamber is small your rely need to meter your fuel. use the wiki and search fuel meter.
'' To alcohol... The cause of, and solution to, all of life's problems.”
--Homer Simpson

Add me on ps3: wannafuk, 8/11/11 cant wait
eXodus31337
Private
Private
Posts: 14
Joined: Wed Apr 27, 2011 10:37 pm

Wed Apr 27, 2011 11:00 pm

Also, when sticking a piezo at the bottom, no spark can ignite the mixture. An open flame will successfully ignite it though.


Edit by Moderator (MrCrowley): There was a double post merged here but I got an error when I tried to amend the changes and lost the merged double post.
User avatar
Crna Legija
First Sergeant 2
First Sergeant 2
Posts: 2333
Joined: Sun Jul 20, 2008 5:14 am
Location: australia

Wed Apr 27, 2011 11:11 pm

down load HGDT read the instructions and then plug in your numbers

also, use the edit button.
'' To alcohol... The cause of, and solution to, all of life's problems.”
--Homer Simpson

Add me on ps3: wannafuk, 8/11/11 cant wait
User avatar
jackssmirkingrevenge
Five Star General
Five Star General
Posts: 26216
Joined: Thu Mar 15, 2007 11:28 pm
Has thanked: 576 times
Been thanked: 347 times

Donating Members

Wed Apr 27, 2011 11:32 pm

looking good! but you need to meter your fuel:

[youtube][/youtube]

andproper ignition
hectmarr wrote:You have to make many weapons, because this field is long and short life
User avatar
Gaderelguitarist
Corporal
Corporal
Posts: 580
Joined: Sat Aug 16, 2008 9:56 pm
Location: Columbia, MD
Contact:

Thu Apr 28, 2011 12:00 am

Slow flame means too much fuel.

Looks great thus far. Can't wait to see it in completion.
so many muchness
User avatar
Hubb
First Sergeant 2
First Sergeant 2
Posts: 2390
Joined: Mon May 28, 2007 8:39 am
Location: South Georgia
Contact:

Thu Apr 28, 2011 1:00 am

I'm gonna let the others answer the question (as they have already done) but I just couldn't resist posting a comment here to say this is some excellent work. I'm looking forward to seeing the finished result. And, since no one else has done it, welcome to Spudfiles.
eXodus31337
Private
Private
Posts: 14
Joined: Wed Apr 27, 2011 10:37 pm

Thu Apr 28, 2011 7:11 am

Thanks to all of you for the help and positive comments :)

Judging by the numbers given by the above soft, it won't be a powerful model but at least it should win some esthetic points at the contest! I'll do the painting soon and post some new pictures.

Alex
User avatar
Crna Legija
First Sergeant 2
First Sergeant 2
Posts: 2333
Joined: Sun Jul 20, 2008 5:14 am
Location: australia

Thu Apr 28, 2011 3:22 pm

well if your not happy with the power you could use the ''valve less' concept but in-place of air pressure you put a hybrid mix. hope you get it, if not jsr can explain it better.
'' To alcohol... The cause of, and solution to, all of life's problems.”
--Homer Simpson

Add me on ps3: wannafuk, 8/11/11 cant wait
eXodus31337
Private
Private
Posts: 14
Joined: Wed Apr 27, 2011 10:37 pm

Sun May 01, 2011 5:40 pm

I've been mixing different ratios and eventually decided that my long and narrow combustion chamber coupled with no bore was simply wrong.

So I went a little creative. I still wanted a straight look to get a good M79 feeling. Here's the idea, I used a 2" pipe to contain a 1.25" pipe using a reversed reductor and an adapter. This way the cannon is inside the 2" pipe and the remaining part servers as a combustion chamber.

Results are not so bad at all :)

(the handle is pretty much done too)
Attachments
2011-05-01 17.57.09.jpg
2011-05-01 17.56.46.jpg
2011-05-01 17.56.29.jpg
2011-05-01 17.56.11.jpg
2011-05-01 10.12.03.jpg
2011-05-01 10.11.13.jpg
eXodus31337
Private
Private
Posts: 14
Joined: Wed Apr 27, 2011 10:37 pm

Sun May 01, 2011 6:09 pm

Oh here's an idea of the soon to be final product.

Any suggestion on how I deal with the fixation of the canon to the handle,the loading mechanism and specially how I deal with failed launches? I thought not gluing the bottom and adding a hinge joint to allow breach loading like the original m79.
Attachments
2011-05-01 18.52.38.jpg
User avatar
Gun Freak
Lieutenant 5
Lieutenant 5
Posts: 4971
Joined: Mon Jan 25, 2010 4:38 pm
Location: Florida
Been thanked: 8 times

Sun May 01, 2011 7:50 pm

So I went a little creative.
It's called a coaxial :lol:

Take the cap off the back and replace it with a female adapter and a threaded plug. That way, when a launch fails, you can unscrew the plug and push the ammo out the front from behind. Sound good?
OG Anti-Hybrid
One man's trash is a true Spudder's treasure!
Golf Ball Cannon "Superna"M16 BBMGPengunHammer Valve Airsoft SniperHigh Pressure .22 Coax
Holy Shat!
eXodus31337
Private
Private
Posts: 14
Joined: Wed Apr 27, 2011 10:37 pm

Fri Jul 08, 2011 9:54 pm

i'm done with the project. finally.

i went the original aluminum tube, worked out an electrical ignition system fully mounted inside the back of the wooden handle. AAA battery is accessible under the tape. wires go through the frame as well.

here's a picture :)

any ideas on working out the sight?
Attachments
2011-07-08 22.36.44.jpg
warhead052
Staff Sergeant 3
Staff Sergeant 3
Posts: 1769
Joined: Mon Mar 21, 2011 5:41 pm

Fri Jul 08, 2011 11:02 pm

Wire coat hanger and some needle nose pliers. Thats my suggestion for the sight, just don't bang it around much. Or if you have a dremel, make it out of balsa wood.

The cannon looks awesome on another note though, maybe just flatten out the trigger guard a bit, it just looks too curved to me.
User avatar
Technician1002
Captain
Captain
Posts: 5189
Joined: Sat Apr 04, 2009 11:10 am

Fri Jul 08, 2011 11:49 pm

When you get the mix right it will pop with a flame burst out the barrel creating a muzzle flash.
Image

The fuel was carefully metered.
Image
Post Reply